Staff homepage
Please see links on the left for specific topics. Some external links and general information:
- Levana Perps docs site
- Includes white paper, technical overview, audit slides, API docs, and potentially more
- Release procedure
- Perps operations playbook (useful for on-call duty)
- Positions Dashboard
- AWS login page
- Note that for our mainnet account, all resources are in the Paris region. You may need to switch regions in the top-right of the management console.
Perps sites
The perps application is made up of both the contracts and the frontend. We use different frontend sites to choose which contracts we use. (Though on non-production deployments there is also a contract selector available.) Different versions of the frontend are built from different branches of the codebase.
| Branch | Contracts shown | Site |
|---|---|---|
develop | All | https://develop.staff.levana.exchange |
develop | Beta | https://develop-testnet.staff.levana.exchange |
develop | Mainnet | https://develop-mainnet.staff.levana.exchange |
staging | All | https://staging.staff.levana.exchange |
staging | Beta | https://staging-testnet.staff.levana.exchange |
staging | Mainnet | https://staging-mainnet.staff.levana.exchange |
main | All | https://main.staff.levana.exchange |
main | Beta | https://testnet-trade.levana.finance |
main | Mainnet | https://trade.levana.finance |
Note that any domain name with the word staff requires authentication with a Levana email address to access.
Perps contracts
At any given time, Levana runs multiple testnet and mainnet sets of contracts of Perps. Each set of contracts has different purposes and stability guarantees. The following apply to testnet:
beta- these are production, testnet deployments. They are intended to always work and be as stable as possible. They are exposed to end users on a regular basis.dev- these are the primary contracts that we test against internallydebug- similar todev, but we don't run liquidity, utilization, or trade bots. This makes it easier to test market corner cases.qa- takesdebugone step farther and allows QA to manually update pricesci- contracts that can be migrated or reinstantiated at any time, not intended to be stable but to get quick feedback on changestrade- used for trading competitions, have special rules to disallow things like multiple faucet taps
We prepend the (shortened) chain name to each of these environments to get the contract family name, such as osmodev, seibeta, and osmoci. As new versions of contracts are deployed, the sites and bots automatically move to the newer versions.
Mainnet contracts are handled differently for heightened security. There are no contract families and contract addresses are hard-coded into the frontend.
Frontend branches
There are three primary branches in the Perps frontend codebase:
develop- any approved PR can be merged into this branch. This branch should generally work correctly, but has not necessarily undergone full QA.staging- a testing ground for code before deploying to production. Generally this branch should only have code that is expected to work. But since full QA typically occurs onstaging, it's still possible that there will be regressions here.main- the production branch, used for public facing deployments.
Status pages
Bot status pages
The bots provide a status page that indicates the current health of a contract, as well as providing useful information. The following bots are running.
| Contract | Status page |
|---|---|
osmobeta | https://osmobeta-bot.levana.finance/status |
osmoci | https://osmoci-bot.levana.finance/status |
osmodev | https://osmodev-bot.levana.finance/status |
osmodebug | https://osmodebug-bot.levana.finance/status |
osmoqa | https://osmoqa-bot.levana.finance/status |
injdebug | https://injdebug-bot.levana.finance/status |
injbeta | https://injbeta-bot.levana.finance/status |
ntrnbeta | https://ntrnbeta-bot.levana.finance/status |
ntrndev | https://ntrndev-bot.levana.finance/status |
rujibeta | https://rujibeta-bot.levana.finance/status |
osmomainnet1 | https://bots-osmomainnet1.levana.finance/status |
injmainnet1 | https://bots-injmainnet1.levana.finance/status |
ntrnmainnet1 | https://bots-ntrnmainnet1.levana.finance/status |
Note that mainnet bots are protected by Cloudflare Access. See more details on how to monitor these in the monitoring section below.
Indexer alert pages
Find out all the markets via this indexer endpoint: https://indexer-mainnet.levana.finance/markets
And based on the market id from that page, you can visit the individual alert page via this url: https://indexer-mainnet.levana.finance/INSERT-CHAIN-ID
Here are the current mainnet alert pages:
| Market | Alert page |
|---|---|
| Osmosis | https://indexer-mainnet.levana.finance/alerts/osmosis-1 |
| Injective | https://indexer-mainnet.levana.finance/alerts/injective-1 |
| Neutron | https://indexer-mainnet.levana.finance/alerts/neutron-1 |
Here are the current testnet alert pages:
| Market | Alert page |
|---|---|
| Osmosis Testnet | https://indexer-testnet.levana.finance/alerts/osmo-test-5 |
| Injective Testnet | https://indexer-testnet.levana.finance/alerts/injective-888 |
| Neutron Testnet | https://indexer-testnet.levana.finance/alerts/pion-1 |
Querier health page
| Deployment | Health page |
|---|---|
| ECS (Both mainnet & testnet) | https://querier-testnet.levana.finance/grpc-health |
| ECS (Only mainnet) | https://querier-mainnet.levana.finance/grpc-health |
Public status pages
Monitoring
Levana uses UptimeRobot for monitoring the health of backend services. Some sensitive services, in particular the bots, are protected by Cloudflare Access, so the configuration needs to be done correctly. This includes:
- Ensure that Cloudflare Access is actually enabled on the domain name.
- When configuring UptimeRobot monitors, make sure to set the following:
- Only accept status code 200. Cloudflare Access will use other codes, like 302, during normal operations.
- Provide a service token via custom headers. You can copy-paste these headers from an existing bot config (like the Osmosis gas check) within UptimeRobot.
- Disable "Follow Redirections"
Generally speaking, accepting only status code 200 and not following redirections should be used for all monitors.
Market shut down
- Short version
- Factory shutdown messages
- Kill switch vs wind down
- Multisigs
- perps-deploy
- Wind down steps
Short version
If there is currently an emergency and you need to shut down a market immediately, you can get the appropriate CW3 multisig information from running the following in the perps repo:
cargo run --bin perps-deploy mainnet wind-down --factory osmomainnet1 --impacts new_trades --kill-switch
Or to shut down specific markets:
cargo run --bin perps-deploy mainnet wind-down --factory osmomainnet1 --impacts new_trades --kill-switch --market ATOM_USD --market ryETH_USD
Then use the smart contract GUI or Apollo Safe to make the recommended proposal, have the multisig participants vote, and then execute.
With the short version done, let's get into details.
Factory shutdown messages
Levana Perps is made up of multiple contracts, but the two most important for us are:
- Factory: this is the central hub for managing all the different markets. Each chain has a single factory. We name them things like
osmomainnet1andseimainnet1. - Market: each individual market is its own contract deployment, and is always associated with a single factory.
The factory contract supports a shutdown message which can be used to disable (and then re-enable) different pieces of individual markets. For example, you can disable the ability to open new trades and deposit liquidity, but allow people to close their existing positions. The details of what can be shut down are available in the docs above.
The shutdown message is permissioned, allowing only authorized wallets to perform these actions. And we have two different wallets authorized for performing most shutdowns. Which brings us to...
Kill switch vs wind down
The kill switch is intended to cover emergency situations, such as "an exploit is happening right now." By contrast, the wind down wallet is intended for longer term operations, like "we're phasing out this market in favor of another one." Permissions-wise, the wind down wallet has the ability to force-close all positions in a market, which the kill switch wallet does not have.
Currently, with the way we've set up our multisigs (more on that below), the same people have access to both the kill switch and wind down mechanisms. But in the future, the plan is that different groups of people would have access to each.
Generally, it's a good idea to use the right wallet for the job. If you're trying to shut down markets because of an emergency, use kill switch. If a market needs to be slowly shut down, use wind down. But in practice, it doesn't matter which one you use, as long as it has the right permissions.
Multisigs
If the kill switch and wind down were simple hot wallets, or even hardware wallets, it would mean that one person has direct control over shutting down markets. That's a situation we want to avoid. Instead, all our mainnet factories are configured to use multisig contracts for their kill switch and wind down mechanism. Specifically, we use a cw3 flex multisig with a cw4 group. At time of writing, each multisig is a 3 of 5 wallet, meaning there are five parties that can vote, and any proposal requires at least 3 yes votes to pass.
Information on wallets and multisigs is available on Google Drive.
The factory contract will only accept shutdown messages from one of these multisigs. To trigger a shutdown, you need to follow these steps:
- Create a multisig message. This is a JSON value indicating what contract you want to interact with, the message to send to that contract, and other details that aren't usually necessary. We'll discuss this step in the next section.
- One of the multisig holders needs to create a proposal. When you create a proposal, you need to provide the multisig contract address, a title, a description, and the JSON value from the previous step. Remember that title and description are publicly viewable on-chain, and should be chosen with that in mind. Proposals can be created with the smart contract GUI or Apollo Safe. (Note: Apollo Safe does not support Sei.)
- Two other multisig holders must then vote yes on the proposal. This can be done from either smart contract GUI or Apollo Safe.
- Once voted on, anyone--even people outside of the multisig group--can execute the proposal.
Here's a sample of a multisig proposal you might make:
Multisig contract: osmo1g03ue88t8ufu5f6pste3x52dfp72njmedp5hnf8q6z0fz0jgw6nq27mrl0
Title: Testing out shutdowns
Description: This is a stress test trying to shut down the ATOM_USD and ryETH_USD markets.
Message:

[{"wasm":{"execute":{"contract_addr":"osmo1ssw6x553kzqher0earlkwlxasfm2stnl3ms3ma2zz4tnajxyyaaqlucd45","msg":"eyJzaHV0ZG93biI6eyJtYXJrZXRzIjpbIkFUT01fVVNEIiwicnlFVEhfVVNEIl0sImltcGFjdHMiOlsibmV3X3RyYWRlcyJdLCJlZmZlY3QiOiJkaXNhYmxlIn19","funds":[]}}}]
The long bit of weird text starting with eyJz is a base64-encoded contract message, which decodes to:
{"shutdown":{"markets":["ATOM_USD","ryETH_USD"],"impacts":["new_trades"],"effect":"disable"}}
This lines up with the shutdown message in the API docs listed above. But constructing these by hand is tedious. So instead, we have...
perps-deploy
The perps-deploy tool is part of the levana-perps repo. It provides lots of different helper functionality as subcommands, including the ability to automatically create these shutdown proposals. The proposal above was created by using the following command:
cargo run --bin perps-deploy mainnet wind-down --factory osmomainnet1 --impacts new_trades --kill-switch --market ATOM_USD --market ryETH_USD
Which generates the following output:
[2024-03-21T11:33:41Z INFO  perps_deploy::app] Connecting to https://grpc.osmosis.zone
[2024-03-21T11:33:41Z INFO  perps_deploy::mainnet::wind_down] CW3 contract: osmo1g03ue88t8ufu5f6pste3x52dfp72njmedp5hnf8q6z0fz0jgw6nq27mrl0
[2024-03-21T11:33:41Z INFO  perps_deploy::mainnet::wind_down] Message: {"wasm":{"execute":{"contract_addr":"osmo1ssw6x553kzqher0earlkwlxasfm2stnl3ms3ma2zz4tnajxyyaaqlucd45","msg":"eyJzaHV0ZG93biI6eyJtYXJrZXRzIjpbIkFUT01fVVNEIiwicnlFVEhfVVNEIl0sImltcGFjdHMiOlsibmV3X3RyYWRlcyJdLCJlZmZlY3QiOiJkaXNhYmxlIn19","funds":[]}}}
[2024-03-21T11:33:42Z INFO  perps_deploy::mainnet::wind_down] Successfully simulated messages
Notable options:
- You can use
--marketas many times as you want, but if you leave it out entirely, the message will target all markets in the factory. --factorycan take strings likeosmomainnet1, but can also take contract addresses if necessary.- The
--impactscan be specified as many times as you want, and indicates what you want to impact. See the API docs above for examples. - By using the
--kill-switchflag, the message will be prepared against the kill switch multisig, not the wind down multisig. - If you include the
--enableflag, instead of disabling functionality in the contract, it will turn it back on.
Wind down steps
The above gives the technical explanation for how to perform shutdowns. If there's a market that needs to be wound down, you should proceed with the following steps:
- Disable
NewTrades,DepositLiquidity, andStaking. - Wait at least 7 days.
- Execute
CloseAllPositionson the market. - At this point, the bots should ignore this market entirely.
New features and requirements
This document describes how the business, product, development, marketing, and QA teams can interact on the new feature development lifecycle. This process must be used for any major features. In some cases for simpler features, simplified versions of this process may be warranted. If you're not sure, discuss how to proceed on a new feature with Michael S.
Roadmap planning
Defining a roadmap gives us guidelines for the features we'll be rolling out over a significant period of time, usually 6-12 months. By identifying a set of changes on a roadmap, we can ensure we properly plan engineering to delivery on the needs of business and marketing. The goal of roadmap planning should be:
- Get as many features discovered as possible that may be desired in the future
- Have a clear delivery plan with lots of milestones, including a clearly defined MVP
- Engineer the solution to allow for future growth, especially future features
To reach these goals, we should follow a process like this:
- Brainstorming Come up with a list of features we may want to include
- Brainstorming can be asynchronous and last for weeks
- Dedicated brainstorming video calls can be very effective
- Track the ideas centrally. Google Drive docs work well for this
- Prune Do a first pass of the ideas as a team and eliminate features we definitely don't want to do
- Quantify Assign some point value for each feature for each of the following:
- Business value: how much will this help the company?
- Engineering cost
- Other factors that would impact scheduling (such as hard external deadlines)
- Organize Sort the features and group them into logical milestones
- We want to focus on getting coherent deliverables! Shipping is a feature too.
- Prioritize based on a combination of business and engineering needs.
- Schedule Create Jira work items and assign to sprints for implementation
- Engineering may decide to do some work out-of-order to reduce costs.
- For work items in the future, consider the possibility that priorities may shift and consider whether work item creation should be delayed.
An example of the last point from the development of the governance/vesting frontend:
Adding a tally of "how much vested LVN has this user claimed" to the smart contract is relatively speaking a small task. Adding that as indexer work is significantly harder and riskier. Doing a migration to add this data to the contract later is a major amount of work. By identifying this feature earlier, we can do the smart contract work now, even if we decide to hold off on the frontend work.
New feature requests
The process above works for planning out the entirety of the roadmap, but does not provide enough details for implementation of individual features. For individual features, we use the following process for getting workable requirements:
- The business and product managers (Jonathan and Don) have full responsibility for defining requirements
- To improve our delivery time, requirements should always start at high-level business requirements, not product requirements or fully-fledged designs.
- All stakeholders (Jonathan, Don, and Michael S) need to review and sign off on these high-level requirements before moving ahead with other steps.
- Once a high level set of business requirements is defined, we can proceed with product requirements. These are not Figma designs.
- Once all stakeholders sign off on this, we can proceed with Figma designs and get sign-off on these.
- At that point, we can begin engineering work: functional requirements, architecture, development, etc.
graph TD
  clearBusinessNeed(Is the business need for this clear?)-->|Yes|stateBusinessRequirements(State the business requirements)
  clearBusinessNeed-->|No|stateBusinessNeed(Document why this feature helps the business)
  stateBusinessNeed-->stateBusinessRequirements
  stateBusinessRequirements-->reviewReqs(Get initial review from stakeholders - engineering, finance, UI design)
  reviewReqs-->|Feedback provided|incorporateFeedback(Incorporate feedback)
  incorporateFeedback-->stateBusinessRequirements
  reviewReqs-->|Receive signoff from stakeholders|createUiReqs
  createUiReqs(Create UI requirements)-->reviewUiReqs(Review UI requirements)
  reviewUiReqs-->|Modify functional requirements|functionalRequirements
  reviewUiReqs-->|Incorporate feedback|createUiReqs
  reviewUiReqs-->|Signoff|functionalRequirements
  functionalRequirements(Create functional requirements)-->reviewFuncReqs(Review functional requirements)
  reviewFuncReqs-->|Modify business requirements|stateBusinessRequirements
  reviewFuncReqs-->|Incorporate feedback|functionalRequirements
  reviewFuncReqs-->|Signoff|scheduleInJira(Create Jira work items and schedule work)
This is an exaggerated process for the most complex cases we would encounter in requirements. In many cases, some of these steps can be skipped entirely. But the important point is to delineate the process as going through the following logical steps:
- Business requirements. This is very high level, such as "allow users to earn LVN rewards on LP deposits."
- Functional requirements. This describes a specific implementation of the business requirements, such as "provide a smart contract that allows farming of xLP and automatically distributes LVN." Functional requirements will usually be very detailed technical documents.
- Review the functional requirements and consider changes to the business requirements.
- UI requirements. Only once we understand how the system should work, and know that it will address the business needs, should we move ahead with designing a UI.
- UI requirements may demonstrate flaws in the functional requirements, which may even demonstrate changes needed in the business requirements. These should be addressed.
- Once we have the business needs defined, know the overall technical implementation we want to take, and have the overall design, then can we plan on starting work.
- Even at this point, it's very likely that mistakes in the functional requirements or UI requirements will be discovered during implementation, and decisions will need to be made to update these.
For very simple features like "change the link text to say X" or "adjust target utilization ratio in market Y," this longer process is not necessary. For many technical work items, we are simply optimizing or otherwise tweaking existing code which implements well-defined requirements.
In other words, the point of this isn't to be pedantic or bureaucratic. The point is to define a most-complex-case approach to how we approach this work.
Demo video scripts
One of the methods we've found for discovering requirements is to describe theoretical demo videos. These videos don't necessarily have to be made. The point is to walk through the process of thinking, "If I wanted to demonstrate the value of this feature to the outside world, how would I do it?" This has historically demonstrated gaps in the product and engineering requirements. Including this as part of brainstorming, business requirements, and product requirements is strongly recommended.
Another alternative to a video script could be tutorial text: write up how a user would perform relevant actions.
What's going live?
If you want to see what's about to be deployed to production in a frontend push:
- Pushing from develop to staging
- Pushing from staging to main (production)
Manual queries against Perps contracts
You'll sometimes want to run queries or transactions directly against Perps contracts. You'll generally want to follow this process:
- Get the market contract address from the
frontend-configendpoint for the relevant bots. You can see the different status URLs on the bot status pages list. Some common endpoints are:- https://bots-osmomainnet1.levana.finance/frontend-config (Osmosis mainnet)
- https://seibeta-keeper.sandbox.levana.finance/frontend-config (SEI beta)
- Open up the smart contract GUI
- Select the appropriate chain
- Connect your wallet
- Copy the appropriate contract address from the
frontend-configpage to the contract address field - Select either "Execute message" to send a transaction or "Query message" to query the contract
- Enter the JSON content in message body (more on that below)
- Click "send transaction"
As you may the selections above within the smart contract GUI, the URL will update to a permalink that can be copy-pasted to keep the same configuration (chain, contract, message, etc.). This can be useful for sharing with others, and can be safely shared outside of Levana as well.
Common messages
Below are some examples of common messages you may want to use with market contracts.
Status query
The status endpoint provides lots of information on a market, such as config, liquidity, and long/short interest. Use the following message:
{"status":{}}
Set price
This is generally only useful for QA purposes against the dragonqa contract. Other contracts use Pyth-based price updates instead.
{"set_price":{"price":"5.4","price_usd":"1.2"}}
price gives the price of the base asset in terms of the quote asset, and price_usd gives the price of the collateral asset in terms of USD.
Others
This page is intended to collect more samples of queries and execute messages that may be useful in the future. Ask someone on the engineering team to add more examples as needed. Also refer to the Cosmos CLI usage page.
Cosmos CLI
The repository cosmos-rs provides Rust library and CLI utility for interacting with Cosmos blockchains over gRPC.
This page documents the CLI part of cosmos-rs.
Installation
cargo install --git https://github.com/fpco/cosmos-rs cosmos-bin --locked
Usage
Countertrade contract is used as an example smart contract in this page. But the concepts apply to other contracts too.
Export environment variables
export COSMOS_GRPC="https://grpc.osmotest5.osmosis.zone"
export COSMOS_NETWORK="osmosis-testnet"
export COSMOS_WALLET="REDACTED"
Note that COSMOS_GRPC is optional and can be used to override the
node being used. If not specified, it will use the default node for
that network.
Deploy smart contracts
❯ cosmos contract store-code ./wasm/artifacts/levana_perpswap_cosmos_countertrade.wasm
Code ID: 9979
❯ cosmos contract instantiate 9979 "osmodev countertrade contract" '{"factory":"osmo1v2599ea7c25kszxjchzm7rfa34rkd75rh0rhrjj2dpg9v9aw0jmqv20um8","admin":"osmo1pqurdp8msxmy6ecue6xdcygg8dsz0ejvcqh5wf","config":{"min_funding":null,"target_funding":null,"max_funding":null,"max_leverage":null,"iterations":null,"take_profit_factor":null}}'
Contract: osmo1v68cqz5t3g46hfaedyx3m0rqpt6az7yuzlz7yhp90p9uwx7lt6pqfxzkyj
How to find out the exact message that should be passed to the
contract ? You have to look into the InstantiateMsg type that is
defined in your smart contract code.
Upload newer version of smart contract
❯ cosmos contract store-code ./wasm/artifacts/levana_perpswap_cosmos_countertrade.wasm
Code ID: 10000
❯ cosmos contract migrate osmo1v68cqz5t3g46hfaedyx3m0rqpt6az7yuzlz7yhp90p9uwx7lt6pqfxzkyj 10000 {}
Print balances
$ cosmos bank print-balances "$MY_WALLET"
49419641uosmo
Query markets
$ cosmos contract query $CONTRACT '{"markets":{}}'
{"markets":[{"id":"ATOM_USD","collateral":"1000","shares":"1000","position":null,"too_many_positions":false}],"next_start_after":null}
Query Cw20 balance
$ cosmos contract query osmo108hkyx02uekpxgrz42388k3l3ryr26k95pq6rmcxxv9qczvp9y9sssm5kk "{\"balance\": {\"address\":\"$MY_WALLET\"}}"
{"balance":"7000000"}
For interacting with cw20 smart contract, you can refer to the corresponding documentation.
Collecting protocol fees
Each Perps market contract collects fees for the protocol inside the contract. Extracting the funds is a two step process:
- Send an unprivileged message to the contract to transfer the fees to the DAO treasury multisig wallet.
- Open a proposal on the multisig to transfer the funds to the desired destination (e.g., centralized exchange).
Transfer fees to multisig - CLI helper
The perps-deploy command line tool can be used by an engineer on the team to transfer accumulated fees from all the markets on a given network to the dao treasury wallet. The commands to run, within the perps repo, are:
cargo run --bin perps-deploy mainnet transfer-dao-fees --factory osmomainnet1
cargo run --bin perps-deploy mainnet transfer-dao-fees --factory seimainnet1
cargo run --bin perps-deploy mainnet transfer-dao-fees --factory injmainnet1
cargo run --bin perps-deploy mainnet transfer-dao-fees --factory ntrnmainnet1
Transfer fees to multisig - GUI
Alternatively, the GUI tool can be used to execute the message for each individual market. You can find a list of market addresses at the relevant frontend config pages:
You can get the full list of active markets and their addresses on the whales page. (Note: this has an extra query string parameter to indicate that addresses should be shown.)
https://share.levana.finance/whales?show_addresses=true
To transfer DAO fees:
-
Open the smart contract GUI
-
Choose the correct network and connect your wallet
-
Under "Message Type," choose "Raw Message"
-
Copy the market address into the ontract address field
-
Click on "Execute message"
-
Copy the following message into the message body field:
{"transfer_dao_fees":{}} -
Click "Send transaction" and approve the transction
Note that this can be performed from any wallet. Also, currently the smart contract GUI does not support Injective. That will hopefully be added soon.
Send funds from multisig - CLI helper
The perps-deploy command line tool can provide a message for sending all funds from the treasury wallet to a destination wallet. An engineer on the team can run this and provide the output messages to one of the multisig holders. The commands to run, within the perps repo, are:
cargo run --bin perps-deploy mainnet send-treasury --factory osmomainnet1 --dest osmo1s9w9l8jxknnpdy05sg46tzp8cg82n66y6cj58x
cargo run --bin perps-deploy mainnet send-treasury --factory seimainnet1 --dest sei1s9w9l8jxknnpdy05sg46tzp8cg82n66yl0sjh4
cargo run --bin perps-deploy mainnet send-treasury --factory injmainnet1 --dest inj1yeppm8uqheu7sdfj4urqzchq8ptp2fldw44n5h
cargo run --bin perps-deploy mainnet send-treasury --factory ntrnmainnet1 --dest neutron1s9w9l8jxknnpdy05sg46tzp8cg82n66ykugxtn
Once you have the messages, you can create a multisig proposal on each of the treasury wallets. For Osmosis and Neutron, you can use either the smart contract GUI or Apollo Safe. For Injective, you can (currently) only use Apollo. For Sei, you can only use the smart contract GUI.
In either case, make a proposal with whatever title and description you'd like, and copy the raw JSON values provided from the command above into the message field.
Send funds from multisig - using Apollo
Instead of the above steps, which require an engineer with command line experience, you can also manually create send coin messages using the Apollo GUI.
The process is easier right now for Osmosis and Injective than Sei, since the Apollo multisig web UI makes send coins an easier transaction but it does not support the Sei network yet. We can look into adding this capability to the smart contract GUI.
- Go to the treasury multisig within the Apollo multisig web UI
- Connect your wallet. Note that you must be one of the multisig holders to continue.
- Click on "Proposals," "Create Proposal," and under "Template" choose "Send."
- Fill in the "Title," "Description," and "Recipient" fields
- Choose the denom that you want to send.
- Enter the amount of the coin that you want to send. You can check the balance of the treasury multisig on mintscan.
- Submit the proposal, get two other multisig holders to vote yes, and then approve the transaction.
Sei addresses
| Description | Address |
|---|---|
| Treasury | sei1kqx8tgk9qedxngw86wseluuajk52mnqhq96q8xtv4zlv4l4qxagsv7xc3m |
ETH_USD market | sei1jvl8avv45sj92q9x9c84fq2ymddya6dkwv9euf7y365tkzma38zq5xldpy |
SEI_USD market | sei14j7zhcj50qsk6vhu7dsa48r5e7v37nthnwwx0q8q4nd0h39udy6qhqq6dm |
Frontend error page testing
The Perps frontend has a number of different full-screen error-like pages. To ease development and QA, on non-production builds, we provide paths that simulated these errors so the page can be viewed.
| Type | URL | Explanation |
|---|---|---|
| Geoblocked | https://develop.staff.levana.exchange/test-error-page/geoblocked | Based on your IP address and location, you cannot access the site |
| Loading | https://develop.staff.levana.exchange/test-error-page/loading | Displayed while initial data is being loaded from the network |
| Not found | https://develop.staff.levana.exchange/test-error-page/not-found | Shown when the URL is invalid |
| Maintenance | https://develop.staff.levana.exchange/test-error-page/maintenance | Maintenance page is used when we need to turn off the perps site temporarily |
| Network data error | https://develop.staff.levana.exchange/test-error-page/network-data-error | Data needed to load the page could not be fetched over the network |
| Root error | https://develop.staff.levana.exchange/test-error-page/root-error | A page that should hopefully never display, it means that an error was not caught and bubbled up to the root of the application. This always indicates some kind of bug in the application code, at the very least it should be handled more gracefully such as a network data error. |
On-call overview
This page discusses the overall responsibilities of an engineer being on-call. The purpose of an on-call engineer is to examine alerts, fix anything that can be easily fixed, and escalate to others if necessary.
There are more details and recommendations for how to resolve problems available in the on call guide document. Please use that page as a reference. All engineers working at Levana must be familiar with the contents of this page.
- Slack channels, OpsGenie, and UptimeRobot
- Slack channel rundown
- Handling OpsGenie and production-monitoring alerts
Slack channels, OpsGenie, and UptimeRobot
The basic mechanism for our monitoring and alerting system looks as follows:
- We have a number of web services that we monitor, such as frontend sites and bots
- Some of these web services provide status pages which will return an error HTTP status code if something is broken
- UptimeRobot is a monitoring tool which will detect these and send alerts to external systems as necessary
- Depending on which piece of the system is broken, UptimeRobot is configured to do one or more of the following:
- Send a message via webhook to a Slack channel (channels discussed below)
- Send an alert to OpsGenie, which will generate an alarm for the on-call engineer
Since OpsGenie will send an alert to an on call engineer at any time, and will bypass do not disturb settings, we try to configure the system so that only the most serious alerts go to it. Therefore, observing the Slack channels when working is vital as well, since some alerts will only go there.
Slack channel rundown
There are many different Slack channels for monitoring. The reason for multiple channels is so that we segregate alerts based on priority. For anyone on-call, and in general anyone on the team, you must respond to messages in the following channels:
#production-monitoring: any production system alert should go here.#production-monitoring-opsgenie: keeps track of alerts that have escalated to OpsGenie. This will provide some OpsGenie-specific information, such as who was alerted about an incident, if it's been acknowledged, etc.
There are additional monitoring channels which are useful for specific purposes but are not production system outages and do not require on-call coverage:
#production-monitoring-gasgives an early warning when the bots are running low on funds. This should fire approximately 3 days before we run out of funds, so there's no crisis if this is unresolved for a few hours. If you see something here, please notify Michael Belote and ask him to refill the wallet.#monitoringmonitors our sandbox systems. You'll see alerts here for both testnet and mainnet. That's because the sandbox system is a test environment for new code, and needs to operate on both testnet and mainnet data to detect issues early. If you're working on backend changes, such as modifications to bots, querier, or indexer, you'll likely want to pay attention to messages here.#monitoring-gastracks the testnet gas funds only, and should have little to no activity#production-devops-monitoringgives more fine-grained alerts about the production system. Unless you're working on the DevOps system itself, it's safe to ignore these. They give a lot of false positives, which is why the alerts are sent to a separate channel.#production-monitoring-statsprovides alerts when the mainnet markets have undesired utilization ratios, delta neutrality, etc. No engineer needs to monitor this channel, though watching it may give you opportunities to make some money by opening unpopular positions and beneifiting from funding fees and DNF payments.
Summary If you're on call, or you're working, and a message comes into #production-monitoring, you should check it out.
Handling OpsGenie and production-monitoring alerts
See the dedicated page on alert handling steps for details.
Alert handling steps
If you are on call and receive an OpsGenie alert, you are responsible for handling that alert until taken over explicitly by another team member. This document covers the steps you should take around managing the alert and communicating with the rest of the team.
For information on how to investigate an outage, check out the on-call incident guide or, if relevant, the investigating user questions page.
graph TD
    newAlert(New OpsGenie alert) -->|Acknowledge| triage(Triage the event)
    triage --> investigate(Investigate the issue)
    investigate -->|I can solve this quickly| solve(Solve the problem)
    solve --> notifyOfResolution(Notify the team on Slack that the problem is resolved)
    investigate -->|Not sure if I can solve this quickly| askForHelp(Ask for help on Slack)
    investigate -->|I definitely can't solve this| escalateInOpsGenie(Escalate in OpsGenie)
    askForHelp --> continueInvestigation(Continue investigation)
    continueInvestigation -->|Can't resolve in a reasonable timeframe| escalateInOpsGenie
    continueInvestigation -->|Not a real bug| ignore(Ignore the issue, explain the situation on Slack)
    continueInvestigation -->|I solved the issue| notifyOfResolution
    escalateInOpsGenie -->|Wait for next on-call person to come online| pairResolution(Work together on determining next steps)
    pairResolution -->|Solve the issue together| notifyOfResolution
    pairResolution -->|Hand off ownership to new engineer| noLongerResponsible(You are no longer responsible)
    pairResolution -->|Neither of you knows what to do| escalateToMichael(Escalate to Michael Snoyman)
    investigate -->|There's a third party involved| contactThirdParty(Contact third party)
    contactThirdParty -->|Continue investigating| continueInvestigation
Basic steps
We will flesh out the details of these steps below.
- Acknowledge in OpsGenie
- Acknowledge the alert within OpsGenie to take ownership and avoid the issue escalating to someone else
- Do basic triage
- Review the alert message, investigate status pages, test the frontend site
- Determine if the alert is real
- Determine if you'll be able to quickly solve this on your own
- Ask for help
- Do this if you are not sure you'll be able to handle the issue on your own
- Support engineers should err on the side of asking for help
- For developers, if you're completely unfamiliar with the source of the problem, also feel free to ask for help immediately
- While still working on resolving the issue, see if anyone else is available on
#production-outage-discussionwho can assist. Feel free to use an@channelping.
- Escalate
- When it becomes clear that you won't be able to resolve the issue on your own in a reasonable amount of time, use OpsGenie to escalate the alert to the next on-call person
- Until that person takes over, you are still responsible
- Stay on with the new person, provide any information you've collected so far, and decide together how to proceed
- Communicate externally
- Some issues may be beyond Levana's infrastructure, and require third party assistance
- If you identify a third party that is relevant to the alert, reach out to them for support
- See the Slack contact list for more information on how to contact external teams
These steps primarily apply to OpsGenie alerts. For alerts in #production-monitoring which do not have an OpsGenie alert associated with them, use your best judgement on how to proceed with the review.
Note that even after asking for help on Slack, you are responsible for managing this alert until someone explicitly takes over from you.
Acknowledging the Alert
- Once you receive an alert, the first step is to acknowledge it. This can be done through the OpsGenie app or web interface.
- Acknowledging an alert signals that you are aware of the issue and are taking steps to resolve it. This prevents the alert from escalating further in the immediate term.
- If you will not be able to resolve the alert within 5-10 minutes, put a message in the
#production-outage-discussionchannel that you're investigating so that, if others are able to assist, they can lend guidance.- Additionally, see escalation protocol below. If you are unable to resolve the issue and do not receive assistance in Slack, you need to use OpsGenie to escalate to the next level of support (on call developer or higher).
- Review the error message you've received and see if you know what the problem is. If so, address the problem and/or notify the responsible parties.
- Note that, for bot errors, you'll need to click through to the bot status page to see the real error message.
- If the alert has already resolved by the time you get the status page open, you can usually click on "view incident details" in UptimeRobot and then download the "full response" to see the message.
- Check live: is the app accessible? Does the page load at all? If it loads, are there errors displayed? If there are no errors, are you able to open a transaction?
- Check if other apps on the chain are still working.
- Check Discord to see if there are notifications about it. Notify Discord users that we're investigating the issue.
- Dive into the error details in Slack messages on the monitoring channels, any OpsGenie report, and potentially logging into AWS and looking at the logs.
Discussions of ongoing outages can take place in the #production-outage-discussion channel on Slack.
In case you require crypto for testing, please setup shared team wallet
You can check who is currently on call within the Levana Slack workspace by sending the message /genie whoisoncall.
Reviewing Alert Details
- Examine the details provided in the alert to understand the nature and severity of the issue.
- Check any attached logs, metrics, or links for additional context.
- Remember that alerts from UptimeRobot will not include the response body from endpoints! You'll need to look at the status page in order to see those details.
Initial Troubleshooting
- Start troubleshooting based on the information provided in the alert.
- Document your actions and findings for future reference and communication.
Escalation (if solution not found in 30 minutes)
- If you cannot resolve the issue within 30 minutes, you should escalate to the next on-call person.
- If you know in less than 30 minutes that you will not be able to resolve the issue, escalate earlier.
- If you believe it is warranted, escalate directly to Michael Snoyman even if he is not on call.
- To escalate an alert in OpsGenie, open the alert in the OpsGenie app or web interface and add Michael Snoyman as a responder.

Follow-Up
- After escalating, stay available for any follow-up questions or assistance.
- Monitor the progress of the escalated alert.
Resolution and Documentation
- Once the issue is resolved, ensure that the alert is marked as resolved in OpsGenie.
- Document the resolution steps and any lessons learned to improve future responses.
Recommended communication around outages
- If you're looking into an outage, say so on Slack. The
#engineeringchannel is a reasonable place to do so, or adding a threaded comment on#production-monitoring. - If you're unable to resolve an alert, you need to decide on whether to ignore the alert, defer the alert, or escalate the alert. Let's go through each case.
- Ignore an alert if you know that the alert is bogus.
- Real life example: UptimeRobot mistakenly alerted that levana.finance was down. It's the middle of the night. You've confirmed manually in your browser and via isup.me that the site is working.
- Acknowledge the OpsGenie alert so that no one else receives the alert.
- Add a threaded comment on
#production-monitoringthat you're ignoring the alert because it's spurious. - Add a comment on the
#engineeringchannel about ignoring the alert. This is important for two reasons:- We need to make sure to resolve the spurious alert in the morning so that real alerts can fire again.
- You may be mistaken for some reason, and this actually needs to be addressed.
- Defer an alert if there's a real problem but fixing right now is a bad idea.
- Example: you see that the indexer is unable to process new blocks because of a bug, but it's 3am.
- You know it's a terrible idea to deploy production code in the middle of the night without code review.
- Acknowledge the OpsGenie alert
- See if users are impacted and consider setting an emergency banner.
- Send a message on
#engineeringdescribing the situation and resume bug fixing in the morning.
- Escalate an alert if the production system is impacted in a significant way and you're unable to resolve it.
- Escalating should happen within OpsGenie if it's the middle of the night to make sure to pierce do not disturb settings.
- Put messages on whatever Slack channels make the most sense, and don't be stingy: let everyone know there's a major issue.
- There's a balancing act here between proper responsiveness to a production system versus overzealously disturbing people's personal time. You'll need to make a decision on whether the situation warrants it on a case by case basis.
Most common errors
This page is meant to be an easier-to-digest list of the most common actions an on-call engineer should take. If nothing in this page helps, see alert handling steps and on-call incident guide.
The two most common things to occur are node issues and Pyth issues.
Node issues
Node issues usually pop up as something like the following:
- Primary node shows as unhealthy and we get an error from a fallback node
- Messages like "block lag detected"
- Query timeouts
In these cases, you should first ping the node provider. For Osmosis and Injective, this is Kingnodes. For Sei, you should reach out to the Sei team directly.
See Slack contact list for contacts.
Pyth issues
The most common Pyth issues will display as:
- Errors from users not being able to see the tradingview chart. This is the lowest priority issue related to Pyth. You should reach out to the Pyth team about the benchmarks API, but there is no risk to the protocol itself.
- The Hermes endpoint going down. We pay for a managed Hermes service from Triton and have a shared chat with them on Telegram. A short-term workaround can be switching our querier and bots services to use an alternate Hermes endpoint. Ask for help in
#engineeringto do that.
Price too old errors
This is getting its own section because it can happen for two completely unrelated reasons. First, let's explain what it is.
Every price update from Pyth includes a publish time. Whenever we need to perform an operation that requires an up-to-date price, such as an open position, the workflow is basically:
- User submits a transaction to the chain to open the position. This creates a deferred execution item.
- The bots notice that a deferred execution item is waiting, and performs a price-update-and-crank.
- Price update occurs by querying the Pyth Hermes endpoint (over HTTPS, it occurs off-chain), getting a price attestation (cryptographically signed proof of a price), and creates an on-chain message to update the Pyth oracle.
- The crank is an on-chain message that causes the contracts to query the Pyth oracle and get the most recent price point that has been submitted to it.
To avoid various price manipulation attack vectors, the market contract will only accept relatively recent price updates (42 seconds on Osmosis, 21 seconds on Injective and Sei, at least at time of writing). price_too_old occurs when the contract sees a price point in Pyth which is too old. This can happen for two different reasons:
-
Pyth is broken in some way. This could be missing data for a specific feed, a problem with the entire Pyth network, or a problem with the specific Pyth Hermes endpoint we're using. This will look something like this:
Price: CNH_USDC: price is too old. Check the price feed and try manual cranking in the frontend. Feed info: Pyth feed 0xeef52e09c878ad41f6a81803e3640fe04dceea727de894edd4ea117e2e332e66. Publish time: 2024-03-08 22:00:02 UTC. Checked at: 2024-03-08 22:01:24.347272368 UTC. Age: 82s. Tolerance: 42s.Note that the "price is too old" message is generated by the bots itself.
-
There's a blockchain node issue causing sync issues, and when we ask the node to simulate a crank, it says "wait, I can't do that, the last price update happened too long ago." This looks something like the following:
Unable to turn crank for market INJ_USD (inj1rw503v6kj56wxdgt83mvhmlmcqtrthkyelhjar)

Caused by:
    On connection to https://inj-priv-grpc.kingnodes.com, while performing:
    simulating transaction: Memo: Price bot discovered crank work available
    Message 0: inj14r7jtujrwmyd6nxqd8mcn4rmcx2n0t2vgf0zwm executing contract inj1rw503v6kj56wxdgt83mvhmlmcqtrthkyelhjar with message: {"crank":{"execs":null,"rewards":"inj1pgahlsqxvwncnqun46ajh27hlwz9l6gsva0qvr"}}
    Status { code: Unknown, message: "failed to execute message; message index: 0: {\n  \"id\": \"price_too_old\",\n  \"domain\": \"pyth\",\n  \"description\": \"Current price is not available. Price id: 0x7a5bc1d2b56ad029048cd63964b3ad2776eadf812edc1a43a31406cb54bff592, Current block time: 1709729249, price publish time: 1709729220, diff: 29, age_tolerance: 21\",\n  \"data\": null\n}: execute wasm contract failed [!injective!labs/wasmd@v0.45.0-inj/x/wasm/keeper/keeper.go:401] With gas wanted: '50000000' and gas used: '195226' ", details: b"\x08\x02\x12\xdc\x03failed to execute message; message index: 0: {\n  \"id\": \"price_too_old\",\n  \"domain\": \"pyth\",\n  \"description\": \"Current price is not available. Price id: 0x7a5bc1d2b56ad029048cd63964b3ad2776eadf812edc1a43a31406cb54bff592, Current block time: 1709729249, price publish time: 1709729220, diff: 29, age_tolerance: 21\",\n  \"data\": null\n}: execute wasm contract failed [!injective!labs/wasmd@v0.45.0-inj/x/wasm/keeper/keeper.go:401] With gas wanted: '50000000' and gas used: '195226' \x1al\n(type.googleapis.com/google.rpc.ErrorInfo\x12@\n\x1cexecute wasm contract failed\x1a\r\n\x08ABCICode\x12\x015\x1a\x11\n\tCodespace\x12\x04wasm", metadata: MetadataMap { headers: {"date": "Wed, 06 Mar 2024 12:47:31 GMT", "content-type": "application/grpc", "x-cosmos-block-height": "62500811", "cf-cache-status": "DYNAMIC", "report-to": "{\"endpoints\":[{\"url\":\"https:\/\/a.nel.cloudflare.com\/report\/v3?s=kG38%2FNgsy9pd7uj0ZTmxEas6kVOzGkoT6Rv6BvvJv5O282FWQkuM9erA%2B95OfpbfIo1ie8qN53JZYUGfJYXkZSZcYgesQD7KnHmf0meSBrMF2dFPTC82YW%2F1Pd2MkMbicUznGqd4noc7p7NZ3w%3D%3D\"}],\"group\":\"cf-nel\",\"max_age\":604800}", "nel": "{\"success_fraction\":0,\"report_to\":\"cf-nel\",\"max_age\":604800}", "server": "cloudflare", "cf-ray": "860274705ef12a34-CDG", "alt-svc": "h3=\":443\"; ma=86400"} }, source: None }
    Height set to: None
    Health report for https://inj-priv-grpc.kingnodes.com. Fallback: false. Healthy: true. Last error: 2024-03-06 12:06:58.232977879 UTC (2433.715511315s): Transport error with gRPC endpoint. status: Unknown, message: "transport error", details: [], metadata: MetadataMap { headers: {} } during action smart query contract inj1rw503v6kj56wxdgt83mvhmlmcqtrthkyelhjar with message: {"oracle_price":{"validate_age":false}}
    Health report for http://injective-grpc.polkachu.com:14390. Fallback: true. Healthy: true. No errors
Note that the error occurred after broadcasting the transaction, due to a delay between constructing the transaction and it being included in a block.
The first case happens most frequently with the non-24/7 markets (things like gold, silver, and forex). This happens because price updates sometimes stop coming in before the official market close hours.
Generally speaking, if the error occurs as part of the "crank run" actions, it's a node sync issue, and you should contact the node provider. If it happens as part of the price bot, it's likely a Pyth issue. If it is a Pyth issue, it's basically the most serious protocol risk possible on this page since the entire protocol will be stalled, and it could be part of a price manipulation attack. You should escalate to the Pyth team on Slack ASAP.
On-call incident guide
Please see the on call overview document for general requirements of being on-call. This page provides various recommendations and collected knowledge of how to resolve different kinds of errors.
Anyone on the team should feel free at any point to add new information here, no PR required. (If you need feedback on your updates, feel free to use a PR instead.)
- Checking status
- Checking Incident reports
- Emergency banner
- Checking AWS logs
- Slack contact list
- Raw ingester grpc endpoint fails
- Out of Sync validator nodes
- Validator health
- Indexer starts failing after a deploy
- Bots fails when trying to fetch factory contract
- Alternate GRPC endpoints
- Find error ID in Sentry
- Osmosis mainnet everyday downtime
- Cosmos SDK error codes
- Gas versus fees
- Stale markets error page
- Running ingester locally to resolve ingestion issues
- Events API from indexer
- Price issue
Checking status
The status pages document contains links to various status pages to check on the health of the system. This is always the current, live status. Historical outages require looking at our various logging services like Sentry, Uptime Robot, and AWS logs.
Checking Incident reports
Uptime robot sends incident reports to various monitoring channels. The most important is #production-monitoring as this is where mainnet outages are sent.
- Click the
View Incident Detailsbutton - this will open the Uptime Robot page - (if necessary) switch teams to Michael's team and then hit the
View Incident Detailsbutton again to get to the specific incident. - There is unlikely to be enough useful information on the page itself, instead hit the
Full Responsebutton - This will download a log of the incident
- In this file: scroll down past the styling and html preamble to get to the actual meat of the page, which may contain something like "Transaction failed" or some other error
Emergency banner
The Downtime Announcement Page on Notion is a vital communication tool for interacting with Levana Perps users during service disruptions. It enables the support team to keep users informed while they investigate and develop solutions to resolve the issue. This page includes a text field specifically for announcements; text entered here is displayed as a banner on the website, accessible to all users. The banner automatically vanishes when the text is deleted and the field is emptied.

Checking AWS logs
- Login to AWS
- Navigate to the Elastic Container Services in the Paris region
- Go to the service in question, and switch to the Logs tab (e.g. bots)
- Use the filters - narrow down the time window, search for keywords like "sequence" or "error", etc.
- Osmosis: https://status.osmosis.zone/
- Injective: https://status.injective.network/
- Pyth: https://pyth.network/stats
- Kingnodes: https://levana-status.kingnodes.com/
- Cloudflare: https://www.cloudflarestatus.com/
For checking logs via CLI, refer Deployment logs page.
Slack contact list
Support members on-call on Saturdays should join these Slack channels to ensure they can coordinate with third parties if issues arise.
| Component | Slack channel | Primary contact | Secondary contact |
|---|---|---|---|
| Osmosis | #levana-osmosis | Adam | Sunny |
| Sei | #levana-sei-collab | Philip | Uday |
| Injective | #injective-levana | Achilleas | |
| Pyth | #levana-pyth | Marc | |
| Kingnodes | #levana-kingnodes | Jerome |
Raw ingester grpc endpoint fails
Solution: Run the raw ingester locally with an alternative grpc endpoint. Ingester is here.
Out of Sync validator nodes
If indexer or bots are giving alerts, there is a likelihood that the validator nodes itself are out of sync.
One way to check that is using mintscan explorer and checking the transactions. These are the links:
A sample snapshot where it shows that there have been no transactions for an hour:
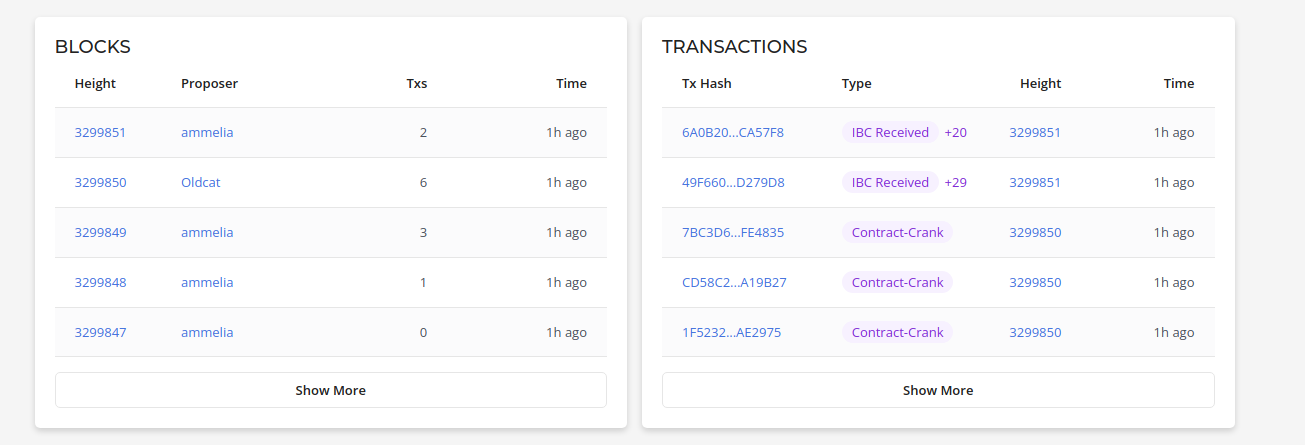
This indicates that most likely the validator is out of sync with the chain. You would want to check with the node providers about the same. You can check in mintscan itself, about what validators they are using. Example for osmosis testnet: https://testnet.mintscan.io/osmosis-testnet/validators
Validator health
Osmosis stats page: https://osmosis-stats.blockpane.com/ This may also be useful for detecting congestion issues
Indexer starts failing after a deploy
Solution: Immediately roll back to the previous stable version. That is done by changing the commit hash in the devops repository. As of this writing this is done in two places:
-
For the testnet ECS deployment.
-
For the mainnet ECS deploylment.
Only then investigate what’s wrong in the current version.
Bots fails when trying to fetch factory contract
This is how a sample log looks like when it fails:
[2023-10-17T02:01:07Z INFO  perps_bots::cli] Wallet address for gas: osmo1s503v5v37qpvwcdchj395l925trnje6hw46krl
Error: Unable to get 'factory' contract

Caused by:
    0: Calling ContractByFamily with factory and osmoqa against osmo1l3ypxctzcdev9dmyydlzrflqz52f0wsqmzkuyq9dvpdnqx69wvvq9zszh2
    1: Error response from gRPC endpoint: Status { code: Unknown, message: "panic", metadata: MetadataMap { headers: {"server": "nginx", "date": "Tue, 17 Oct 2023 02:01:07 GMT", "content-type": "application/grpc", "x-cosmos-block-height": "3197200"} }, source: None }
You can use the cosmos binary to debug it further. Check if you are able to query the contract:
❯ cosmos query-contract --network osmosis-testnet osmo1l3ypxctzcdev9dmyydlzrflqz52f0wsqmzkuyq9dvpdnqx69wvvq9zszh2 '{"version": {}}'

Error: Error response from gRPC endpoint: Status { code: Unknown, message: "panic", metadata: MetadataMap { headers: {"server": "nginx", "date": "Tue, 17 Oct 2023 02:23:44 GMT", "content-type": "application/grpc", "x-cosmos-block-height": "3197200"} }, source: None }
You can also try to override the GRPC endpoint and see if it works. Example:
❯ cosmos contract-info --cosmos-grpc="https://grpc.testnet.osmosis.zone"
You can check if the contract actually exists:
❯ cosmos contract-info --cosmos-grpc="https://grpc.testnet.osmosis.zone"  --network osmosis-testnet osmo1l3ypxctzcdev9dmyydlzrflqz52f0wsqmzkuyq9dvpdnqx69wvvq9zszh2
code_id: 48
creator: osmo12g96ahplpf78558cv5pyunus2m66guykt96lvc
admin: osmo12g96ahplpf78558cv5pyunus2m66guykt96lvc
label: Levana Perps Tracker
Alternate GRPC endpoints
Find error ID in Sentry
Errors on the webapp can be mapped to Sentry with an ID.
- Click the more details button to the right of the error notification
- A modal will be presented and the error ID can be found at the top
- Copy this ID and navigate to Sentry
- Within Sentry focus on the
Custom Searchinput and add the keytransaction.idwith the value as the error ID- Example:
transaction.id:0TX720DLL
- Example:
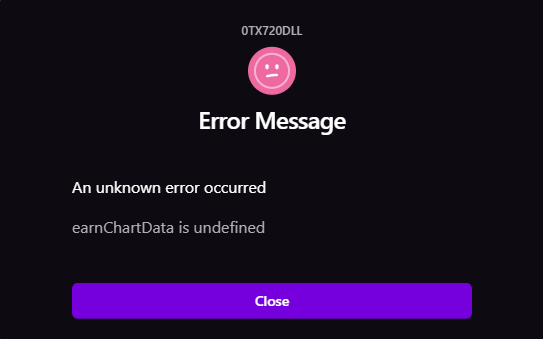
Note: Only error IDs in production and staging will be sent to Sentry.
Osmosis mainnet everyday downtime
Osmosis mainnet has a period of about 15 minutes every day in which it's not processing any new transactions. That period may trigger crank alerts and potentially some other types of alerts also.
You can read more about how the epoch works here. According to the Osmosis team, the epoch happens 24 hours since it happened last time.
Query for finding the last epoch:
❯ osmosisd query epochs epoch-infos --node https://osmo-priv.kingnodes.com:443
epochs:
- current_epoch: "852"
  current_epoch_start_height: "11955200"
  current_epoch_start_time: "2023-10-18T17:16:09.898160996Z"
  duration: 86400s
  epoch_counting_started: true
  identifier: day
  start_time: "2021-06-18T17:00:00Z"
- current_epoch: "121"
  current_epoch_start_height: "11880838"
  current_epoch_start_time: "2023-10-13T17:02:07.229632445Z"
  duration: 604800s
  epoch_counting_started: true
  identifier: week
  start_time: "2021-06-18T17:00:00Z"
Using date utility convert it your local timings:
❯ date -d "2023-10-18T17:16:09.898160996Z"
Wed Oct 18 10:46:09 PM IST 2023
So the last epoch happened on October 18th, 10:46 PM local time. So On October 19th, if around 10:44 PM - you get alerts - it's highly likely that it's because of epoch.
Cosmos SDK error codes
You can find a list of Cosmos SDK error codes in the cosmos-sdk repo.
Note that the error codes are namespaced, so CosmWasm error codes are defined elsewhere, in the wasmd repo
These do conflict over the error code numbers, e.g. code 5 in CosmosSDK means "insufficient funds" while code 5 in CosmWasm means "contract execution failed"
Gas versus fees
There are a few similar error messages you may see coming from the Cosmos SDK:
out of gas in location: wasm contract; gasWanted: 198152, gasUsed: 202921: out of gas(code 11)Transaction failed with insufficient fee (13) and log: insufficient fees; got: 1488uosmo which converts to 1488uosmo. required: 9129uosmo: insufficient fee(code 13)- Insufficient funds (code 5)
All of these have the flavor of "not enough gas," but they all mean different things, and therefore the solution to them is completely different. Let's start with terminology:
- Every action you take on chain requires some
gas. Gas is a unit of the work necessary to perform your action. You can think of it as something like "how much CPU time will it take to perform this action," though that's a huge simplification. - When you run a transaction, you have to declare in advance how much gas you want to use. This is
gasWanted. This is defined when you construct the transaction. - The usual way we calculated
gasWantedis by simulating the transaction, seeing how much gas it actually took during simulation to getsimulated gasUsed, and then multiplying it by thegasMultiplier. ThegasMultiplieraccounts for both variations in how much work is performed (more on this in a bit), plus some straight up bugs in Cosmos where simulated gas underreports how much gas will be needed for a transaction. - Once you have a
gasWanted, you need to provide agas feeto pay for that gas. This is usually done in the native coin for the chain (e.g.uosmo). You determine how muchgas feeto provide by multiplyinggasWantedby thegas price. - Osmosis has rolled out a
fee marketmechanism where thegas pricegoes up and down based on demand. Most other Cosmos chains have a fixedgas price.
With this information in mind, let's go back to our errors above.
- Code 11, out of gas, occurs when the
gasWantedyou specified in the transaction is insufficient to perform the transaction. This can happen because of bugs in Cosmos (this is especially true for coin transfers for some reason), or because the work performed is different from the work simulated. We have a common case of this in Perps: cranking. Each time you crank, you're working on a new set of work items. It's fairly common for cranking to fail with code 11 because the simulated work was simpler to perform than the actual work. - Code 13 (insufficient fee) is when the
gas priceyou used is insufficient. This used to just be a configuration issue, but with Osmosis'sfee marketimplementation, it seems that this can happen because different nodes have miscalculated thegas price. - Code 5 (insufficient funds) looks a lot like (2), but actually means something else entirely: you specified a certain amount of gas funds, let's say 0.3 OSMO. However, your wallet didn't have that balance available.
Solutions to each of these are completely different:
- Code 5 can almost always be solved by transferring more coins into the wallet in question.
- Code 13 is usually solved by increasing the gas price. How you do that is a separate question. With Keplr, for instance, you can manually set a gas fund amount. Remember that this is different from the gas amount itself! This is the same concept of Keplr showing low, medium, and high gas prices.
- Code 11 is usually solved by either trying again (the correct response for crank errors), increasing the
gasMultiplier, or manually setting a highergasWanted.
If you're looking at bots, the cosmos-rs library handles a lot of this logic, and you'd probably need to make a modification to that library, or at least to environment variables on the bots, to make a change. Generally, if you're hitting an issue with an automated tool, the best thing to do is to try to manually perform the same action (either via the cosmos-rs CLI tool or the smart contract GUI).
The current osmosis gas price can be gotten via https://lcd.osmosis.zone/osmosis/txfees/v1beta1/cur_eip_base_fee or https://querier-mainnet.levana.finance/v1/chain/osmosis-mainnet-gas-price
Note that our bots set a maximum on the gas price on Osmosis mainnet. If you see "transaction failed with insufficient fee," you should check at the URLs above if the gas price has gone too high. At time of writing, our bots limit the gas price to 0.0054. If the number is higher than that, it's expected that transactions will fail because validator nodes will not pick up our transactions. In such a case, you should contact the Osmosis team for clarity on the current situation and notify the #product channel of the congestion.
Stale markets error page
When some markets become stale, open the status page for the bots(included in alert) and check not only the Stale section, but also the sections of individual crank messages even if they're green. They might include useful information.
Running ingester locally to resolve ingestion issues
Note that for this step to work, you would have to get in touch with
KingNodes to white list your IP address temporarily. If instead you
want to ingest a single block at a specific height, do this under the
indexer repository:
❯ just single-ingest 69443328
There may be issue with ingester not being able to process blocks. One easy way to resolve this is running the ingester locally and see if it's able to process blocks and subsequently upload the blocks to the S3 storage.
For running this locally, you would need these things:
- Access to the indexer codebase.
- Postgres instance running locally
- S3 bucket credentials (Get in touch with Sibi for this)
- just tool.
These are the high level steps on how to run ingester locally for sei testnet:
- Run postgres locally. Go inside the indexer repository's
packages/indexerdirectory where there will be justfile to make things easier. You can run postgres like this:
❯ just postgres
docker run --name indexer_pg --rm -it -e POSTGRES_PASSWORD=postgres -p 5432:5432 postgres:15.3-alpine -c log_statement=all
The files belonging to this database system will be owned by user "postgres".
This user must also own the server process.

The database cluster will be initialized with locale "en_US.utf8".
...
- Export the S3 credentials locally:
export AWS_ACCESS_KEY_ID="REDACTED"
export AWS_SECRET_ACCESS_KEY="REDACTED"
- Based on the network export appropriate environment variables. Since we are going to run for sei testnet, these are the steps:
export COSMOS_NETWORK="sei-testnet"
export COSMOS_GRPC="https://grpc-testnet.sei-apis.com"
export COSMOS_GRPC_FALLBACKS="https://grpc.atlantic-2.seinetwork.io"
To know the exact string representation for COSMOS_NETWORK
environment variable, you can refer the code here.
To find out the GRPC endpoints that you can use, you can refer from the file here.
- Do a db reset to initialize the tables:
❯ just db-reset
env DATABASE_URL="postgres://postgres:postgres@localhost/indexer" sqlx database reset -y
Applied 0/migrate initial (32.973392ms)
Applied 1/migrate event tables (84.317193ms)
...
Now let's say that you want to start from block height of 60000000, you would have to do this:
❯ just psql
env PGPASSWORD="postgres" psql -U postgres -h localhost -d indexer
psql (15.5, server 15.3)
Type "help" for help.

indexer=# select * from chain;
 id |   chain_id
----+---------------
  1 | atlantic-2
  2 | osmosis-1
 10 | injective-1
 11 | injective-888
 14 | pacific-1
(5 rows)
indexer=# INSERT INTO latest_block_bulk VALUES (1, 60000000, now());
INSERT 0 1
If an value is already present, you can update it like this:
UPDATE latest_block_bulk SET height = '60000001' WHERE chain = 1;
- And now you can start the ingester:
❯ just run-ingester
env LEVANA_INDEXER_BIND="[::]:3003" PGPASSWORD="postgres" PGHOST="localhost" PGUSER="postgres" PGDATABASE="indexer" PGPORT="5432" cargo run --bin indexer raw-ingester-bulk
    Finished dev [unoptimized + debuginfo] target(s) in 0.17s
     Running `/home/sibi/fpco/github/levana/levana-indexer/target/debug/indexer raw-ingester-bulk`
pid1-rs: Process not running as Pid 1: PID 36349
2024-01-12T06:10:07.416625Z  INFO indexer::raw_ingester: Checking if https://static.levana.finance/perps-indexer/ingested__atlantic-2__60000000-60002000.json.br exists, received: Response { url: Url { scheme: "https", cannot_be_a_base: false, username: "", password: None, host: Some(Domain("static.levana.finance")), port: None, path: "/perps-indexer/ingested__atlantic-2__60000000-60002000.json.br", query: None, fragment: None }, status: 403, headers: {"date": "Fri, 12 Jan 2024 06:10:07 GMT", "content-type": "application/xml", "cf-ray": "84433c0abbef6033-SIN", "cf-cache-status": "DYNAMIC", "access-control-allow-origin": "*", "access-control-allow-headers": "*", "access-control-allow-methods": "GET, OPTIONS", "x-amz-id-2": "749v7S+wEOIdz8I/rGiDC/GOwwW7XvtlG3KNZU1EMF5rtNyKOHZufSa6fxtRcOuDMYgzQTZ3mD0=", "x-amz-request-id": "Z1T07RWWYQRWEJNQ", "server": "cloudflare"} }
2024-01-12T06:10:07.417025Z  INFO indexer::raw_ingester: https://static.levana.finance/perps-indexer/ingested__atlantic-2__60000000-60002000.json.br does not exist
2024-01-12T06:10:09.985046Z  INFO indexer::raw_ingester::ingest: Successfully ingested block 60000031, total txs: 1, filtered txs: 0
2024-01-12T06:10:10.877006Z  INFO indexer::raw_ingester::ingest: Successfully ingested block 60000029, total txs: 2, filtered txs: 0
2024-01-12T06:10:10.937725Z  INFO indexer::raw_ingester::ingest: Successfully ingested block 60000008, total txs: 3, filtered txs: 0
2024-01-12T06:10:11.021031Z  INFO indexer::raw_ingester::ingest: Successfully ingested block 60000017, total txs: 2, filtered txs: 0
2024-01-12T06:10:11.927936Z  INFO indexer::raw_ingester::ingest: Successfully ingested block 60000015, total txs: 4, filtered txs: 0
Events API from indexer
The events API in the indexer can be a convenient wait to get a stream of events related to a wallet. For example, when investigating a user claim of incorrect calculations, I used the following URL:
https://indexer-testnet.levana.finance/events?wallet=sei1jdr8zu4j488wqxx97frr0u8qsz799ywkhsfq3v
This gave me a JSON response with all events for the wallet. (Note: you may have to paginate.) By looking through, I was able to find the close position event I was looking for, get the transaction hash, and then look up the transaction on a block explorer.
Price issue
At a high level, this is what the Price bot does:
- Fetches the Prices from the HTTP Hermes endpoint
- Fetches oracle price from on chain (stored in the Pyth contracts)
And based on the above fetch, it calculates whether the price should be updated. The above fetch layer can also result in errors if there is issue with either the hermes endpoint or the Pyth contract.
If you receive an error like this:
AKT_USD: price is too old. Check the price feed and try manual cranking in the frontend.
Feed info: Pyth feed 0x4ea5bb4d2f5900cc2e97ba534240950740b4d3b89fe712a94a7304fd2fd92702.
Publish time: 2024-08-06 15:56:58 UTC. Checked at: 2024-08-06 15:57:57.539826136 UTC.
 Age: 59s. Tolerance: 42s.
You can receive the above error in two possible scenarios:
- This means that the price fetched from the Hermes endpoint is not new enough and it has exceeded the configured tolerance seconds.
- There is a significant chain congestion delaying when the price lands on-chain i.e. You have already updated the price via the bots, but it has not yet landed on chain because of the current on going congestion. There is a Jira ticket to report and distinguish this kind of issue.
If it's happening because of issues in Hermes endpoint, reporting to these channels would be a good next step:
- #levana-pyth
- #p2p-levana-grpc
Investigating user questions
"I didn't close my position"
This is a sample session of trying to track down a user bug report. This particular case ended up with no bugs at all (which is fairly common), but the important bit is the tooling and approaches we use for solving it. Let's start with the bug report:
wallet osmo1nvqn77ygcfm2w4rvqrwj7m4ugul73vt9ednt7j
position 3462
I was jumping between pages (trade and history) and the position closed without my intervention - I'm using Kepler wallet and was not asked for approval to close the position. I closed the position at a -12.65USD + fee loss as a result.
There are a few things to note about this right off the bat:
- It doesn't specify which chain the user was trading on. Fortunately, that's easy enough to figure out from the wallet address: Osmosis.
- It doesn't specify which market the uesr was trading in. Generally it's reasonable to respond to users directly and ask for clarification on this point. However, in this case, it was easy enough to figure it out without the user's input.
The first thing I did was viewed the site as the user. In the near future, this will be an official part of the public site. For now, it's only available on internal deploys of the site, such as the develop branch. From this page:
- Make sure to switch networks to Osmosis mainnet
- Click on connect wallet and copy-paste the wallet address above
- Go to the history tab
From here, you can look for the relevant position from the "trade history" section. When I checked, the user had 11 positions in the history, and only one with an ID of 3462. That position is in the TIA/USD market, and shows a -12.65 USD for PnL, so it lines up with the user report. We'll go with that.
The next step is to determine the market contract address for the TIA/USD market. The easiest way to get that is to check out the frontend config endpoint from the bots. From this, I see a contract address for TIA_USD of osmo1kqzkupfec3zemmaj3kuhcf0h2wke02wa7sgp2a9vq5mugtgs5pzs8avjzt.
Next, we want to look at the on-chain history for this position. To do that, we need to run the following query against the contract:
{"position_action_history":{"id":"3462"}}
You can do this on the command line with the cosmos CLI tool:
➜ COSMOS_NETWORK=osmosis-mainnet cosmos query-contract osmo1kqzkupfec3zemmaj3kuhcf0h2wke02wa7sgp2a9vq5mugtgs5pzs8avjzt '{"position_action_history":{"id":"3462"}}'
{"actions":[{"id":"3462","kind":"open","timestamp":"1701710617851441037","collateral":"10.857540857765601958","transfer_collateral":"12","leverage":"10.947003784264420053","max_gains":"1.22606442383761503","trade_fee":"2.078089105405467622","delta_neutrality_fee":"7.907517698694531141","old_owner":null,"new_owner":null,"take_profit_override":"9.3","stop_loss_override":"8.15"},{"id":"3462","kind":"close","timestamp":"1701712745309314227","collateral":"10.639037850826950797","transfer_collateral":"10.639037850826950797","leverage":null,"max_gains":null,"trade_fee":null,"delta_neutrality_fee":"-5.798714565570383823","old_owner":null,"new_owner":null,"take_profit_override":null,"stop_loss_override":null}],"next_start_after":null}
Or in the smart contract GUI. Either way, we see that the position was closed at the timestamp 1701712745309314227.
If you go to epoch converter and enter that value, you get a timestamp of Monday, December 4, 2023 5:59:05.309 PM (in GMT). The next step is to figure out the block height for that block. My preferred way of doing that is to use the cosmos CLI tool:
➜ COSMOS_NETWORK=osmosis-mainnet cosmos chain first-block-after --timestamp 2023-12-04T17:59:05Z
12631606
With that in place, you can now go to Mintscan and find the block in question. It turns out that this block has 30 transactions, and in theory you'll need to look through each one to find either a crank message or something else related to the protocol. Basically: look for anything that's using the TIA_USD contract address mentioned above. Generally, you can look in the "messages" column and look for either the word "crank" or "contract-update price", which is what most Perps transactions look like.
Going one by one through the transactions, you'll eventually come to the relevant transaction. This transaction--like most transactions users send--has two messages. The first updates the Pyth oracle price. You can ignore that one. The second one is what the user actually did:
{
  "msg": {
    "close_position": {
      "id": "3462",
      "slippage_assert": {
        "price": "8.662108",
        "tolerance": "0.005"
      }
    }
  },
  "funds": []
}
Even if you aren't familiar with the internals of perps, it's pretty obvious that this is trying to close position #3462. Mintscan lists the sender as osmo1nvqn77ygcfm2w4rvqrwj7m4ugul73vt9ednt7j, which is the wallet address mentioned above.
At this point:
- We've identified why the user's position was closed: the user (or someone controlling the user's wallet) closed it.
- We have a Mintscan link demonstrating that.
- We have no idea how this actually happened. Did the user make a mistake? Is the user's wallet compromised? Is the user pulling a prank on us? Is the entire blockchain broken and someone is randomly closing positions for fun?
In any event, there's no more work to be done on research here. Provide the link to the transaction back to the user, and call it a day.
"The price in the history never happened"
Relevant Jira bug report: UFI-78
Hi,
I just checked the WBTC/USD oracle feed for the day my position got liquidated and the lowest of the day was $40,662.70 and not 40,218.87 USD that it is written in history.
It clearly is a bug on your side and my position would be in quite good profit right now.
I expect you to please take a look at my issue asap and let me know whether you are going to reopen my position.
Thank you
position id is 6744
osmo13tqhtr7m67zw0hj7axrw9hap7dfds97rmkw8k7Please see Zendesk Support tab for further comments and attachments.
Generally speaking, the correct response to this issue would be to point the user to the before reporting a bug page and ask them to provide comprehensive information to back up their claims. That didn't happen in this case, and we're going to use it as a learning exercise in how to investigate.
The first and easiest thing to do is to use the "view as" feature on the site to see that this position did, in fact, close with the price point provided in the bug report (40,218.87 USD). The next question is: was this a valid price point? One answer is "the smart contracts treated it as a price point so it must be valid," which is true. However, we can do better than this.
First, let's get the contract address for the BTC/USD market. My preference is to check the frontend-config file or the bot status page. Either way, you'll end up with the contract address osmo1nzddhaf086r0rv0gmrepn3ryxsu9qqrh7zmvcexqtfmxqgj0hhps4hruzu. Next, let's get the information about when this position closed. We can do that by performing the following query against the market contract:
{"position_action_history":{"id":"6744"}}
You can do this from the smart contract GUI and get the following response:
{
  "actions": [
    {
      "id": "6744",
      "kind": "open",
      "timestamp": "1702045382294420059",
      "collateral": "0.17710915390234318",
      "transfer_collateral": "0.179146",
      "leverage": "11.620755384767910956",
      "max_gains": "0.816302488254187237",
      "trade_fee": "87.510718328292878517",
      "delta_neutrality_fee": "1.412402852632010417",
      "old_owner": null,
      "new_owner": null,
      "take_profit_override": null,
      "stop_loss_override": null
    },
    {
      "id": "6744",
      "kind": "close",
      "timestamp": "1702323672974158242",
      "collateral": "0.010798702590289875",
      "transfer_collateral": "0.010798702590289875",
      "leverage": null,
      "max_gains": null,
      "trade_fee": null,
      "delta_neutrality_fee": "0.558535157234580985",
      "old_owner": null,
      "new_owner": null,
      "take_profit_override": null,
      "stop_loss_override": null
    }
  ],
  "next_start_after": null
}
We can see that the position closed at timestamp 1702323672974158242. It's not important what that converts to, but using Epoch Converter, we can see that it converts to Monday, December 11, 2023 7:41:12.974 PM. The next question is to find out the spot price in affect in the market at that time. We can do that using another market query:
{"spot_price":{"timestamp":"1702323672974158242"}}
Using smart contract GUI we get the response:
{
  "price_notional": "0.0000248639504275",
  "price_usd": "40218.870405",
  "price_base": "40218.870405",
  "timestamp": "1702323672974158242",
  "is_notional_usd": true,
  "market_type": "collateral_is_base",
  "publish_time": "1702323659000000000",
  "publish_time_usd": "1702323659000000000"
}
Looking at the publish_time field (which is identical to publish_time_usd in this case, since both base and collateral prices are the same BTC/USD feed), we see that the price point was published by Pyth at 1702323659000000000. This value is given in nanoseconds since the epoch. You can convert to seconds since the epoch (which we'll need shortly) by dividing by 1,000,000,000, or equivalently by removing the 9 trailing zeros. This gives us 1702323659, or Monday, December 11, 2023 7:40:59 PM.
Next, we need to get the Pyth feed ID for the BTC/USD market. You could look at the spot price config by sending a {"status":{}} query to the market, but in this case it may be easier to search for BTC/USD on the Pyth price feeds ID page. This gives us e62df6c8b4a85fe1a67db44dc12de5db330f7ac66b72dc658afedf0f4a415b43 (which does in fact match up with the spot price config).
To look up historical Pyth prices, we'll need to use the Benchmarks API. The benchmarks docs page provides /v1/updates/prices, described as "Historical Price Updates Proof," which is what we want here. You can construct the appropriate query directly in that web interface, or put it together by hand. Either way, you'll end up with a URL that looks like this:
There's a bunch of data in there, but the end of it is what's important:
{"id":"e62df6c8b4a85fe1a67db44dc12de5db330f7ac66b72dc658afedf0f4a415b43","price":{"conf":"3649130373","expo":-8,"price":"4021887040500","publish_time":1702323659},"ema_price":{"conf":"3182778300","expo":-8,"price":"4099412400000","publish_time":1702323659}}
And as you can see, at that publish time, the price of BTC/USD did in fact reach 40218.87 USD.
Levana anonymized account names
| Real name | Psuedonym | GitHub | Discord | Telegram | |
|---|---|---|---|---|---|
| Aditya Kalia | Jade Dragon | jade-dragon@levana.exchange | https://github.com/lvn-jade-dragon | ||
| Alejandro De Cicco | Alduin | alduin@levana.exchange | https://github.com/lvn-alduin | ||
| Asparuh Kamenov | Dragon Book | dragon-book@levana.exchange | https://github.com/lvn-dragon-book | ||
| Carla Hamoy | Drakaina | drakaina@levana.exchange | |||
| Corey Werner | Skate Dragon | skate-dragon@levana.exchange | https://github.com/lvn-skate-dragon | SkateDragon#9399 | |
| Daniel Liferenko | Reef Dragon | reef-dragon@levana.exchange | https://github.com/lvn-reef-dragon | ||
| Erik Balogh | Talented Dragon | talented-dragon@levana.exchange | https://github.com/lvn-talented-dragon | ||
| Jan Gloser | Ruby Dragon | ruby-dragon@levana.exchange | https://github.com/lvn-ruby-dragon | ||
| Michael Belote | Smaugs Treasury | smaugs-treasury@levana.exchange | |||
| Michael Snoyman | Rusty Dragon | rusty-dragon@levana.exchange | https://github.com/lvn-rusty-dragon | RustyDragon#2239 | |
| Sibi Prabakaran | Hasky Dragon | hasky-dragon@levana.exchange | https://github.com/lvn-hasky-dragon | ||
| Piotr | Mindful Dragon | mindful-dragon@levana.exchange | https://github.com/mindfuldragon |
Local setup for GitHub
This is one approach to getting permissions set up locally for GitHub, it’s not required but may be helpful.
-
Create a new SSH keypair and save it somewhere, for example
~/.ssh/id_rsa_rusty_dragon -
Upload the public key for this keypair to your new Levana GitHub account
-
Choose a directory to keep all your Levana repositories, e.g.
~/levana -
Add the following to your
~/.gitconfigfile:[includeIf "gitdir:~/levana/"] path = ~/levana/gitconfig -
Create a new file
~/levana/gitconfigwith the following contents (tweaked for your settings):[user] name = Rusty Dragon email = rusty-dragon@levana.exchange [commit] gpgsign = false [core] sshCommand = "ssh -i /home/michael/.ssh/id_rsa_rusty_dragon"
Git workflows
We try to keep a simple, light-weight workflow across Git repositories. Here are some guidelines:
- Always use your anonymized Dragon GitHub accounts for Levana-related commits. This includes both private Levana repositories, public Levana repositories, and interactions with other projects.
- Similarly, when referring to team members, use their anonymized GitHub usernames, not their real names (even just first names).
- Every project has a default branch which should be the target of pull requests, unless you have a reason to do something else. We're slightly inconsistent across repos on this, sometimes using any of
develop,main, andmaster. - Feature branches should almost always be opened in response to a specific JIRA issue, and the branch name should be based on the JIRA issue number. For example, if you're working on JIRA issue PERP-1234 which implements support for Frobnication, a good branch name would be
perp-1234/add-frobnication. - There are no specific rules on the project regarding clean/linear history. You're allowed to merge, squash commits, or rebase as desired.
- Avoid changing unrelated files in a PR. As a common example, if you wanted to reformat the entire codebase, that should be its own dedicated PR that only performs the reformating, not including other semantic changes.
- Once PR review has started, do not rebase the branch until the PR review has finished. Reason: rebasing during a review breaks the ability to see changes since the last review.
- Again, clean history is not required on these projects. However, if you want to clean up a complex PR's history, do so after the pull request has been approved but before merging. Or, if appropriate, you could use GitHub's squash feature.
New markets checklist
This section will provide information to determine the parameters for new markets, as well as providing instructions to follow when deploying the new markets.
Parameters for new markets
We divide the parameters into 3 types:
External market parameters
| Parameter | Value |
|---|---|
| crank_execs | 7 |
| crank_fee_charged | 0.1 USD |
| crank_fee_surcharge | 0.08 USD |
| crank_fee_reward | 0.09 USD |
These values are based on the behavior of the block chain (gas costs and maximum gas per transaction).
Business Parameters
| Parameter | Value |
|---|---|
| crank_execs | 7 |
| crank_fee_charged | 0.1 USD |
| crank_fee_surcharge | 0.08 USD |
| crank_fee_reward | 0.09 USD |
| minimum_deposit_usd | 5 USD |
| max_liquidity | Unlimited |
| disable_position_nft_exec | false |
| referral_reward_ratio | 0.05 |
| max_xlp_rewards_multiplier | 2 |
| min_xlp_rewards_multiplier | 1 |
| mute_events | false |
| unstake_period_seconds | 3888000 (60*60*24*45) |
| protocol_tax | 0.3 |
These are determined by business requirements.
Market Parameters
Each new market has a set of parameters that are set in
market-config-updates.toml.
The parameters are listed below with their default values:
| Parameter | Value |
|---|---|
| trading_fee_notional_size | 0.001 |
| trading_fee_counter_collateral | 0.001 |
| funding_rate_sensitivity | 10 |
| funding_rate_max_annualized | 0.9 |
| borrow_fee_rate_min_annualized | 0.01 |
| borrow_fee_rate_max_annualized | 0.60 |
| borrow_fee_sensitivity | 0.08333333333333333 ((1/12)) |
| target_utilization | 0.8 |
| max_leverage | 30 |
| carry_leverage | 10 |
| delta_neutrality_fee_sensitivity | 50000000 |
| delta_neutrality_fee_cap | 0.005 |
| delta_neutrality_fee_tax | 0.05 |
| exposure_margin_ratio | 0.005 |
| liquidity_cooldown_seconds | 3600 (60*60) |
| liquifunding_delay_seconds | 86400 (60*60*24) |
| liquifunding_delay_fuzz_seconds | 3600 (60*60) |
-
trading_fee_counter_collateral and trading_fee_notional_size: The trading fee is charged by a combination of a ratio of the counter collateral plus a separate ratio of notional size. In addition to providing protocol fees, higher fees provide protection against spot price manipulation attacks by increasing the cost of opening positions. If there were no fee you could update your position's counter-side collateral manipulating utilization ratio without any cost. Reference Reference with sheets
- Most assets have the
trading_fee_counter_collateralandtrading_see_notional_sizeset at 0.001, but a few assets have both set at 0.002 if their spot markets are more easily manipulated.
- Most assets have the
-
funding_rate_sensitivity This value is always between 1 and 2. The smaller the market, the higher its sensitivity. The current used values are 1, 1.5, and 2. At some point in the future, we can try to identify good reasons to change this from the defaults. For now, follow existing markets for guidance.
-
funding_rate_max_annualized: The max annualized unpopular funding rate that is allowed. (This means that funding rate can never be higher than 90% when using default value) Most assets have it set to 0.9. Only a few have it set to 0.45. These are either FX, BTC, Silver and Gold. The markets with lower max funding rates are set that way to support 100x leverage without setting high DNF fees. There markets have a lower funding max rate in order to support 100x. In any case, they are down to 50x leverage.
-
borrow_fee_parameters We set the initial borrow rate based on the risk-free return available (usually staking rewards APR). The min and max borrow fees are somewhat arbitrary, intended to ensure LPs receive a reasonable return on their deposits. Follow existing markets.
Further Reading: When you open a position, your max possible gain is locked by the LP. You pay borrow fees to cover the cost of the locked collateral – LP’s cannot withdraw that. Borrow fee is a function of locked collateral (utilization ratio) We have a target utilization ratio – 50% on low market. If it is less than 50%, then borrow fee is decreased We have min and max borrow fees (And max funding rate) Conversation the describes the relationship between borrow fees and utilisation ratio
-
target_utilization This is the LP utilisation ratio that we aim for. All assets have it set to 0.5%
-
On the relationship between target utilisation, and actual utilisation ratio
-
exposure_margin_ratio:
This was added to addressed the "delayed trigger" attack:
Delayed trigger
- Attacker opens up a pair of delta neutral positions and allows one of the positions to approach liquidation price. Attacker congests the chain, blocking the ability to liquidate a position as it continues to go further into its liquidation margin. Eventually the position cannot pay out its entire negative price exposure, while its pair position continues to experience gains on its price exposure.
- Mitigated by including an exposure margin and more fully realizing trader losses from the rest of the liquidation margin.
- Mitigated by having bots use very aggressive gas prices for extreme price movements.
-
liquidity_cooldown_seconds There is a potential vulnerability that could exploit liquidity providers (LPs) by taking advantage of unrealized profits not affecting LP holdings. The LP price is only updated when trades are closed, meaning liquidity is locked to cover maximum gains without influencing LP value until then. A malicious actor could monitor real-time trades, provide liquidity right before liquidations or stop-loss events, and withdraw rewards at will. They could also farm LP rewards and withdraw them when large positions approach "maximum gain" thresholds, or attempt front-running attacks before a trader closes a position. Since the trading price is settled by oracles, sandwich attacks are unlikely. To mitigate this, we introduced the liquidity cooldown value. Detailed thread can be found here, explaining the need for a liquidity withdrawal cooldown, to avoid any malicious attacks on the LP pools
-
liquifunding_delay_seconds This prevents an attack vector from large deposits and withdraws by ensuring that LPs will be exposed to at least one realization of price exposure during their time holding LP tokens.
-
liquifunding_delay_fuzz_seconds This is a mechanism to ensure we don't have large groupings of liquifundings at once. The goal is to avoid congestion of the protocol. The concern was an event that caused a bunch of positions to be opened at the same time. We want to smooth out the liquifunding times. Reference
Notes
COIN_USDCandETH_BTCare not actually used. They're just for testing
DNF and Leverage
FYI, current live values can be found in the live market-analyzer.
Spot-price perpetual protocols without delta neutrality fee have no native price discovery mechanism. The model depends on arbitrage with the spot market to propagate the price response through the spot price oracle.
If the perpetual swaps volume starts to approach the volume on the spot market, big trades on the protocol without a delta neutrality fee would benefit traders at the expense of liquidity providers by creating small-scale flash meltdowns and meltups.
Spot market manipulation also starts to become more profitable. If an attacker is able to manipulate the spot market price short-term by a significantly higher margin than trading fees on the protocol, they are able to guarantee a profit from the protocol, ultimately draining liquidity providers.
This is why Levana introduced the DNF parameter. However, the downside for traders is that there is an inverse relationship between DNF and max leverage. Meaning that a higher leverage requires lowering the DNF sensitivity. So, the smaller the market, the more sensitive it is to attacks.
For example, increasing max leverage from 4x to 30x tightens DNF caps by about 8 times, making the market more sensitive to imbalance. In a low liquidity market, this could mean the cap for market imbalance drops from $400k to $50k, restricting position openings.
Determining DNF sensitivity, DNF cap, and max leverage
The full calculation of DNF sensitivity is described below.
It's important to note that when we are calculating the max leverage, we are interested in the DNF_sensitivity in USD NOT the notional.
That is because we then use a unified scale to determine the leverage. That scale is:
DNF Sensitivity (USD) -> max Leverage
<20m: 4x
20-50m: 10x
50m-200m: 30x
>200m: 50x
Once the max leverage is determined, we can calculate the dnf_cap.
The mapping for delta_neutrality_fee_cap that has been used to ensure that there is no immediate liquidatability
(assuming the usual params for funding/borrow caps and trading fees) are:
4x: 0.03
6x: 0.025
10x: 0.015
30x: 0.005
50x: 0.0002
Please note that the dnf_sensitivity parameter must be converted back to notional, because it is used in other areas that assume it is in notional.
For example, the funding rates are calculated using notional interest, and notional DNF. Using a dnf_usd would lead to wrong funding rate values.
Calculating the DNF sensitivity (With example)
These are the steps for calculating DNF sensitivity for a market pair
like BASE_USD or BASE_USDC. These steps are not applicable if the
quote asset is something else.
As said earlier, we will use the spot markets to determine the trading volumes, and as a result the DNF sensitivity and leverage.
Repeat this step for 7 days:
- Open coingecko / markets / Spot.
- Remove all DEX from consideration.
- Remove HTX (Huobi) from consideration. There has been reports of them 'faking' volume by using bots running on 2 accounts, the places rapid and large amounts of limit orders. More can be found here. This artificial volume is detrimental to our study, and thus we remove HTX from the list.
- Remove all exchanges which has been either inactive or if coingecko indicates that there is anomaly in the trading price or volume.
- Sort by 24h volume in decreasing order.
- Calculate the sum of
Volume %of the filtered exchanges. - Note down the first exchange in the list.
- Calculate the sum of
- For the first exchange on the list:
- Calculate it's market share by dividing its volume percentage by that sum of volume percentage that you calculated in the above step.
- For that exchange, choose lowest of +2% and -2% depth liquidity and divide it by the market share value that you computed in the above step.
- Multiply the result by 25 to get the DNF sensitivity.
- The DNF parameter is given in the notional asset. The calculations above will give you a value in the quote asset. For collateral-is-base markets, notional and quote are the same asset, so no further actions are needed.
- The value computed here can be used to choose max leverage parameter:
<20m: 4x
20-50m: 10x
50m-200m: 30x
>200m: 50x
Note that m stands for a million.
Note that if you are having a market like LVN_SEI, then compute the
DNF based on the rest of the algorithm. Then multiply it by the price
of the asset to get USD-equivalent DNF sensitivity for the purpose of
deciding on max leverage.
If max leverage is less than 3m, then it's best not to launch it. The carry leverage is usually chosen as half the max leverage.
- For collateral-is-quote markets, you need to convert from the quote to the base asset by dividing by the current price of the asset.
If the quote pair is different, then this is the formula:
DNF_SENSITIVITY(XXX_YYY) = MIN(DNF_SENSITIVITY(XXX_USD), DNF_SENSITIVITY(YYY_USD))
The DNF sensitivity that you have calculated above is for a particular day. You would have to repeat the same for successive days. Once you have enough data, you would have to choose a conservative value out of it. In the above steps, you have to choose a specific day based on which you will perform calculations. For DNF calculation, we will choose the day with the exchange that has a minimum of (+/-)2% liquidity depth (Note that the exchange itself will be chosen which has the highest trading volume, but liquidity depth is used to determine which day will be chosen for calcuating DNF).
Calculation example
Let's follow the above steps for the LVN coin for a single day:
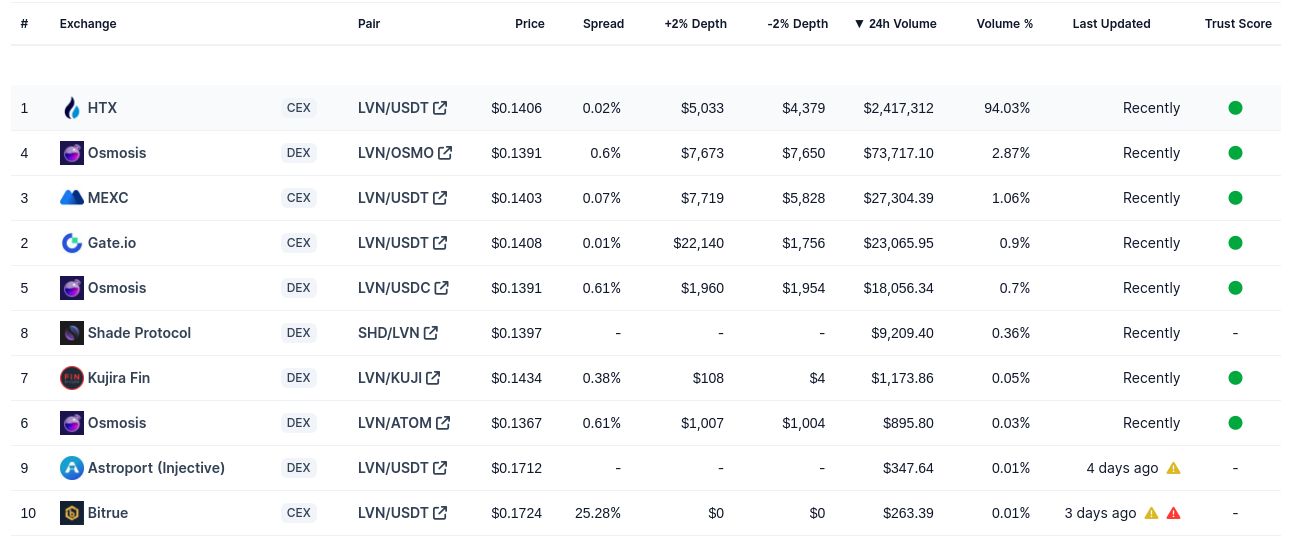
- Removing all DEX and other exchanges, leaves us with three exchanges: MEXC, Gate.io (All DEX are elimited, HTX is eliminated, Bitrue is eliminated because of anomaly)
- Sorting it, we have two filtered exchanges: MEXC and Gate.io
- Calculate Sum of volume %:
SUM(1.06, 0.9) = 1.96
- Compute Market share: 1.06/1.96 = 0.54
- MIN(7719, 5828) = 5828
- DNF sensitivity: (5828/0.54)*25 = 269814.81
New Market deployment
This document goes over the technical steps required to deploy a new market.
Launch new testnet market (perps-deploy)
You would need to have the credential of deployer's wallet for this to work.
Let's add a new market for testnet:
$ cargo run --bin perps-deploy testnet add-market --family osmobeta --market WIF_USDC
Error: No MarketConfigUpdate found for WIF_USDC
You would need to go and update market-config-updates.toml
files. Once you update that, try executing the same command:
$ cargo run --bin perps-deploy testnet add-market --family osmobeta --market WIF_USDC
Error: No oracle market found for WIF_USDC
You would need to go and update the config-price.toml file. Once you
would do that, you would be able to add the market without any further issues:
$ cargo run --bin perps-deploy testnet add-market --family osmobeta --market WIF_USDC
[2024-04-01T07:23:26Z INFO  perps_deploy::app] Connecting to https://grpc.osmotest5.osmosis.zone
[2024-04-01T07:23:27Z INFO  perps_deploy::instantiate] Finding CW20 for collateral asset USDC for market WIF_USDC
[2024-04-01T07:23:27Z INFO  perps_deploy::instantiate] Using existing CW20
[2024-04-01T07:23:28Z INFO  perps_deploy::instantiate] osmo12vhejqqdgnszlcs7nqdvlx3p5eqyudfslevx3k is already a faucet admin for osmo1ycrm74p7uc976hu2z428l27vxj8l44zu0x0yqjr8gh775qr6gtnq9f3zsz
[2024-04-01T07:23:31Z INFO  perps_deploy::instantiate] Minted in 0050BEC079BABDCC37D10CC93348F78096F177A3F0D471655EB164F09C6DD440
[2024-04-01T07:23:31Z INFO  perps_deploy::instantiate] Using CW20 osmo1l5wc2znxhmf9gutyknk9dwwcj6pk0a57sc4wc24qcd63ft08a7jqmkl58p
[2024-04-01T07:23:34Z INFO  perps_deploy::instantiate] Market WIF_USDC added at 4B5BB048451B4F201F09491E0407A1A8CEE0E53ED12275E0D0C5224EC6C78002
[2024-04-01T07:23:34Z INFO  perps_deploy::instantiate] New market address for WIF_USDC: osmo1wyyfac2mng86wurgdlgdk5pu4fcw7yr7twupxeewm6039rxwwheqj6amh2
If you had to update any specific parameter for that market, you can do it like this:
cargo run --bin perps-deploy testnet update-market-configs --family osmobeta --market-id WIF_USDC "{\"delta_neutrality_fee_sensitivity\": \"40000000\"}"
Once you have added a market in testnet, you would have to add liquidity. This can be done like this:
cargo run --bin perps-qa deposit-liquidity --contract-family osmobeta --market-id WIF_USDC
Launch new mainnet market (perps-deploy)
You can generate a mainnet multisig proposal for adding a new market with a command like the following, run within the levana-perps repo:
cargo run --bin perps-deploy mainnet add-market --factory injmainnet1 --market-id BTC_USD
The above command will print various things like the CW3 contract address and the message. Make sure to pretty print the json message for the smart-contract-gui to recognize it properly.
Initial setup
The new factory should be provided an initial gas fee to covert 6 months of price and crank bot operations. This can be estimated based on a price update occuring once every minute for the market, and use the most recent few transaction on chain to determine the average cost. (this changes over time based on improvements to Pyth oracle gas optimization).
Frontend support for new markets
- Make sure to add a new market config entry in
constants.ts. The market will not display in the frontend without this. This is where you define icons, tradingview price feed, and more. - Once a market is deployed, inside the frontend repo, run
(cd etc/twitter-share/ && cargo run). This will generate a shell script for creating Twitter share HTML files per market. It will print out an error message for any market missing a share icon. If that happens, ask for a new icon on#ui-designand then upload tos3://static.meteors.levana.finance/cards/perps-markets. This will become visible at a URL like https://static.levana.finance/cards/perps-markets/ATOM.png. See static file hosting for more information.- Note that this executable internally has some logic for mapping market names. At time of writing, this only applies to mapping
axlETH_USDtoETH_USD, which is also handled on the frontend.
- Note that this executable internally has some logic for mapping market names. At time of writing, this only applies to mapping
Deploying a new factory in a new blockchain
Note that most of the step documented here is part of this screencast.
To enable multisigs and permission system on a blockchain, deploy these contracts on the chain:
Make sure to deploy both of them via the cosmos cli:
$ cosmos contract store-code $HOME/Downloads/cw3_flex_multisig.wasm
Code ID: 1189
Similarly for cw4-group.wasm:
$ cosmos contract store-code $HOME/Downloads/cw3_flex_multisig.wasm
Code ID: 1190
And then you need to make sure that cosmos binary supports it. Sample
PR for it. Make sure to install the new cosmos binary in your
$PATH.
Get all the addresses that will be used for multisig purpose. If you get an address for a specific blockchain (eg: Osmosis), you can convert it to another blockchain using cosmos cli (This will only for chains with the same derivation path. E.g. Injective and Sei wallet addresses can't be converted like this) Example:
$ cosmos wallet change-address-type osmo1x4dmdw3829cmuf3zf65dydr2mf8x229rfny5ds neutron
neutron1x4dmdw3829cmuf3zf65dydr2mf8x229r9h7xp9
Now create a new CW3 flex contract backed with CW4 group behind
it. Let's create it for Levana Perps Owner purpose:
$ cosmos cw3 new-flex --weight-needed 0.6 --duration 3d --label "Levana Perps Owner" --member neutron17s76s29nyuu5p6xaqz0sndw3sgl78hy4gqm342  --member neutron1x4dmdw3829cmuf3zf65dydr2mf8x229r9h7xp9 --member neutron1z3s9600e2hm32u0n3ntcczeg6nvcsx5quef6dq --member neutron10zwektqxpzg3ma8hf6wvg3mm5htmpxhrxmc0ae --member neutron1rr0m0wz598g4jzgqlhmxsns7lsflkwnmklcuql
Created new CW4-group contract: neutron1ql4zrg4skj9y5v8cg5mua62nkgaup6zzpsaxpmdhaq89sglv6t6qffua0h
Created new CW3-flex contract: neutron1n9pkq0wljphqssvl5k7tjjpljxujzlffgnekw6aeve8tmgsr5ndq3kkmrz
Fixing permissions on the contracts to make the CW3 the admin
Admin permissions updated in DAC9134B57EC10976E17B93123A7FA4EF214BD0DD0D407FDC0FCDCD63FB4201D
Make sure to note the contract address in the output.
These are the options explanation:
| Flag | Explanation |
|---|---|
| --label | On-chain label used for the CW3 |
| --weight-needed | Percentage of total weight needed to pass the proposal |
| --duration | Duration. Accepts s, m, h, and d suffixes for seconds, minutes, hours, and days |
| --member | Equal-weighted voting members of the group |
Note how you had to put all the 5 wallet address in that command. Repeat the same command as above, but with this label instead:
- Levana Perps Treasury
- Levana Perps Kill Switch
- Levana Perps Wind Down
- Levana Perps Migration Admin
You would have got 10 contract address (5 cw4-group and 5 cw-3). You would have to add them in the spreadsheet which Michael will provide.
Now let's deploy the contracts to the blockchain. Get the specific
commit id from which you need to build the contracts. Switch to that
commit id and run the following command from the levana-perps
repository to build the contracts:
❯ just build-contracts
./.ci/contracts.sh
++ readlink -f ./.ci/contracts.sh
+ SCRIPT=/home/sibi/fpco/github/levana/levana-perps/.ci/contracts.sh
++ dirname /home/sibi/fpco/github/levana/levana-perps/.ci/contracts.sh
....
....
....
236f885abf5dc65722cfbf8be8bbd0317acf4d661a6a9a86695584b04aa232d3  levana_perpswap_cosmos_cw20.wasm
a6a1361a1d8604dfc1ac06a7c67c6b705837265bb3996b0b4d526a63e0ff6597  levana_perpswap_cosmos_factory.wasm
b93d2778bab1a8f93379b83cf5e34bb05f917a578efd2873c17bead52541baa2  levana_perpswap_cosmos_farming.wasm
ed4112522ac015fdda7671484b8371f0c288da2112586fdf62d32452eb0942eb  levana_perpswap_cosmos_faucet.wasm
cbfc0400d0c010406c2c5fa0f367e85df5e0184994e4dcf461ca9f381a341782  levana_perpswap_cosmos_hatching.wasm
1bdbf1069164a22dca98e4f1862d87411af11ba12e15d686007b76ca7bb52e00  levana_perpswap_cosmos_ibc_execute_proxy.wasm
17297d13f9fb2b932bff6df5cbb3a849fbbc5a20ef5dc23117b661a084b5f34f  levana_perpswap_cosmos_liquidity_token.wasm
2b2c8c28e2ba2124add8f889f4a3a0645e6735f67a7fefb0de374af2763321d7  levana_perpswap_cosmos_market.wasm
076db0ac7c2b41165d70e1532628ed708512176b77068ec640710c4dc8bff17a  levana_perpswap_cosmos_position_token.wasm
8b846b0bcca8cb348c7c5dcc2496927deca2cd52c0f7256dbce73f93b16c03dd  levana_perpswap_cosmos_rewards.wasm
bd7712b45c0098e016752dd903aa793fbfedc24db44bf8151a81f5b73c6f3242  levana_perpswap_cosmos_tracker.wasm
Confirm that the hashes match and then proceed towards storing the contracts on the chain.
$ cargo run --bin perps-deploy mainnet store-perps-contracts
[2024-05-08T08:26:18Z INFO  perps_deploy::app] Connecting to http://grpc-kralum.neutron-1.neutron.org
[2024-05-08T08:26:18Z INFO  perps_deploy::mainnet] Storing Factory...
[2024-05-08T08:26:22Z INFO  perps_deploy::mainnet] New code ID: 1191
[2024-05-08T08:26:22Z INFO  perps_deploy::mainnet] Storing Market...
[2024-05-08T08:26:30Z INFO  perps_deploy::mainnet] New code ID: 1192
[2024-05-08T08:26:30Z INFO  perps_deploy::mainnet] Storing LiquidityToken...
[2024-05-08T08:26:33Z INFO  perps_deploy::mainnet] New code ID: 1193
[2024-05-08T08:26:33Z INFO  perps_deploy::mainnet] Storing PositionToken...
[2024-05-08T08:26:41Z INFO  perps_deploy::mainnet] New code ID: 1194
And then you can instantiate the factory:
$ cargo run --bin perps-deploy mainnet instantiate-factory --factory-label "Levana Perpetual Swaps" --ident "ntrnmainnet1" --owner neutron1n9pkq0wljphqssvl5k7tjjpljxujzlffgnekw6aeve8tmgsr5ndq3kkmrz --dao neutron1d70f2z7ad6ttgkjf66k6q9cv0pf5xy7vcfm76jhjnduly670g8kqlzpxpm --kill-switch neutron142f7aql7any3gzk4f9uyqulalucx5ht8r94y5tsnj5vt4pwzq7pqjv5mdn --wind-down neutron1al43ntd6k45r4yp3h5c4cza5pt4vlzh47qadp6yx50pn5qyvmqwqxrdfa6 --migration-admin neutron1su4hspnnd2ulhxpqlw5lnxl9vyavnzcvfeernk3pt9gk0cdam3kqfvrmaw
Finished dev [unoptimized + debuginfo] target(s) in 0.15s
     Running `target/debug/perps-deploy mainnet instantiate-factory --factory-label 'Levana Perpetual Swaps' --ident ntrnmainnet1 --owner neutron1n9pkq0wljphqssvl5k7tjjpljxujzlffgnekw6aeve8tmgsr5ndq3kkmrz --dao neutron1d70f2z7ad6ttgkjf66k6q9cv0pf5xy7vcfm76jhjnduly670g8kqlzpxpm --kill-switch neutron142f7aql7any3gzk4f9uyqulalucx5ht8r94y5tsnj5vt4pwzq7pqjv5mdn --wind-down neutron1al43ntd6k45r4yp3h5c4cza5pt4vlzh47qadp6yx50pn5qyvmqwqxrdfa6 --migration-admin neutron1su4hspnnd2ulhxpqlw5lnxl9vyavnzcvfeernk3pt9gk0cdam3kqfvrmaw`
[2024-05-08T08:34:01Z INFO  perps_deploy::app] Connecting to http://grpc-kralum.neutron-1.neutron.org
[2024-05-08T08:34:01Z INFO  perps_deploy::mainnet] Instantiating a factory using code ID 1191
[2024-05-08T08:34:06Z INFO  perps_deploy::mainnet] Deployed fresh factory contract to: neutron1an8ls6d57c4qcvjq0jmm27jtrpk65twewfjqzdn7annefv7gadqsjs7uc3
Note that each of the address you have specified here is the contract
address of the CW3-flex contract that you received from the cw3 new-flex sub command above.
Now that you have a factory, you can add markets to it:
$ cargo run --bin perps-deploy mainnet add-market --factory ntrnmainnet1 --market-id NTRN_USD
: Compiling perps-exes v0.1.0 (/home/sibi/fpco/github/levana/levana-perps/packages/perps-exes)
:     Finished dev [unoptimized + debuginfo] target(s) in 5.97s
:      Running `target/debug/perps-deploy mainnet add-market --factory ntrnmainnet1 --market-id NTRN_USD`
: [2024-05-08T08:45:46Z INFO  perps_deploy::app] Connecting to http://grpc-kralum.neutron-1.neutron.org
: [2024-05-08T08:45:47Z INFO  perps_deploy::mainnet] Validating spot price config for NTRN_USD
: [2024-05-08T08:45:47Z INFO  perps_deploy::mainnet] Need to make a proposal
: [2024-05-08T08:45:47Z INFO  perps_deploy::mainnet] CW3 contract: neutron1n9pkq0wljphqssvl5k7tjjpljxujzlffgnekw6aeve8tmgsr5ndq3kkmrz
: [2024-05-08T08:45:47Z INFO  perps_deploy::mainnet] Message: [{"wasm":{"execute":{"contract_addr":"neutron1an8ls6d57c4qcvjq0jmm27jtrpk65twewfjqzdn7annefv7gadqsjs7uc3","msg":"eyJhZGRfbWFya2V0Ijp7Im5ld19tYXJrZXQiOnsiY29uZmlnIjp7ImJvcnJvd19mZWVfcmF0ZV9taW5fYW5udWFsaXplZCI6IjAuMSIsImJvcnJvd19mZWVfc2Vuc2l0aXZpdHkiOiIwLjMiLCJjYXJyeV9sZXZlcmFnZSI6IjIiLCJjcmFua19mZWVfY2hhcmdlZCI6IjAuMDUiLCJjcmFua19mZWVfcmV3YXJkIjoiMC4wNDUiLCJjcmFua19mZWVfc3VyY2hhcmdlIjoiMC4wMjUiLCJkZWx0YV9uZXV0cmFsaXR5X2ZlZV9jYXAiOiIwLjAzIiwiZGVsdGFfbmV1dHJhbGl0eV9mZWVfc2Vuc2l0aXZpdHkiOiI4MDAwMDAwIiwiZGVsdGFfbmV1dHJhbGl0eV9mZWVfdGF4IjoiMC4yNSIsImV4cG9zdXJlX21hcmdpbl9yYXRpbyI6IjAuMDIiLCJmdW5kaW5nX3JhdGVfc2Vuc2l0aXZpdHkiOiIyIiwibGlxdWlkaXR5X2Nvb2xkb3duX3NlY29uZHMiOjg2NDAwLCJtYXhfbGV2ZXJhZ2UiOiI0IiwidGFyZ2V0X3V0aWxpemF0aW9uIjoiMC41IiwidHJhZGluZ19mZWVfY291bnRlcl9jb2xsYXRlcmFsIjoiMC4wMDIiLCJ0cmFkaW5nX2ZlZV9ub3Rpb25hbF9zaXplIjoiMC4wMDIifSwiaW5pdGlhbF9ib3Jyb3dfZmVlX3JhdGUiOiIwLjIiLCJtYXJrZXRfaWQiOiJOVFJOX1VTRCIsInNwb3RfcHJpY2UiOnsib3JhY2xlIjp7ImZlZWRzIjpbeyJkYXRhIjp7InB5dGgiOnsiYWdlX3RvbGVyYW5jZV9zZWNvbmRzIjoyMSwiaWQiOiJhOGU2NTE3OTY2YTUyY2IxZGY4NjRiMjc2NGYzNjI5ZmRlM2YyMWQyYjY0MGI1YzU3MmZjZDY1NGNiY2NkNjVlIn19LCJpbnZlcnRlZCI6ZmFsc2V9XSwiZmVlZHNfdXNkIjpbeyJkYXRhIjp7InB5dGgiOnsiYWdlX3RvbGVyYW5jZV9zZWNvbmRzIjoyMSwiaWQiOiJhOGU2NTE3OTY2YTUyY2IxZGY4NjRiMjc2NGYzNjI5ZmRlM2YyMWQyYjY0MGI1YzU3MmZjZDY1NGNiY2NkNjVlIn19LCJpbnZlcnRlZCI6ZmFsc2V9XSwicHl0aCI6eyJjb250cmFjdF9hZGRyZXNzIjoibmV1dHJvbjFtMmVtYzkzbTlncHdnc3JzZjJ2eWx2OXh2Z3FoNjU0NjMwdjdkZnJocmttcjVzbGx5NTNzcGc4NXd2IiwibmV0d29yayI6InN0YWJsZSJ9fX0sInRva2VuIjp7Im5hdGl2ZSI6eyJkZWNpbWFsX3BsYWNlcyI6NiwiZGVub20iOiJ1bnRybiJ9fX19fQ==","funds":[]}}}]
: [2024-05-08T08:45:47Z INFO  perps_deploy::mainnet] Simulation completed successfully
Create a multisig proposal for the above message and execute it to add the market. Also make sure to commit your levana-perps changes and send the appropriate PR.
There are other steps included in deploying a factory to mainnet:
- Update indexer to index that chain
- Update assets configuration for the chain
- Deploy new indexer jobs in both testnet and mainnet ECS
- Update config in the frontend for the new chain
- Make sure the cosmos-rs library supports the new chain
- Add the factory address to the companion server (levana-perps repo)
and
etc/twitter-sharein the frontend repo.
Fixing the "MPA: Unrecognized Exchanges Found" Issue
This guide outlines the steps required to resolve an "MPA: Unrecognized exchanges found" issue.
The process involves three main steps:
- Retrieve the exchange ID
- Determine if the exchange is a CEX or DEX
- Update the
coingecko.rsfile with the exchange ID
Step 1: Retrieve the Exchange ID
When an exchange is unrecognized, the #market-parameters Slack channel will display notifications titled "MPA: Unrecognized exchanges found" every hour. These notifications contain the market IDs of the unrecognized exchanges.
To retrieve the exchange ID, use one of these market IDs in the following command:
cargo run --bin perps-market-params exchanges --market-id [market-id]
Execute this command in the root directory of the levana-perps repository. Note that the environment variable LEVANA_MPARAM_CMC_KEY is required to run this command.
Step 2: Determine if the Exchange is CEX or DEX
Visit the CoinMarketCap exchanges page and search for the name of the unrecognized exchange. The page has 4 main tabs.
- Spot
- Derivatives
- DEX(Spot)
- DEX(Derivatives)
Check which tab lists the exchange. This will indicate if it’s a CEX (centralized) or a DEX (decentralized) exchange.
Step 3: Update the coingecko.rs file with the Exchange ID
In the levana-perps/packages/perps-exes/src/bin/perps-market-params/coingecko.rs file, update the exchange_type method by adding the new exchange ID based on whether it is a CEX or DEX.
After updating coingecko.rs, deploy the market analyzer with the latest changes.
Code Guidelines - Rust
General note: the below is almost entirely in terms of contract code, and therefore must take into account the larger ecosystem which relies heavily on javascript/typescript/go clients. This requires a few tradeoffs which are not ideal for pure Rust, but are more ideal in the big picture and our requirements. Cli tools, bots, servers, and other Rust projects may depart from some of these guidelines in significant ways
General guidelines
- Whenever possible, make coding requirements machine enforceable and part of the CI tooling.
- Focus on guidelines that maximize the ability of the compiler to prevent us from making mistakes.
Basic rules
- Avoid
as-casting. It can truncate data depending on the types, and can silently upgrade a safe operation to a truncating one. Instead, leveragetype::from,type::try_from,value.into(), andvalue.try_into(). - Keep visibility (
pubvspub(crate)etc.) tight when possible. Motivation: we want to correctly receive notifications of unused exports. - Do not do things like disabling warnings on an entire module, much less a crate. Some specific warnings (like clippy too-many-arguments) can be ignored, but that should always happen at the specific warning site.
- When possible, leverage techniques that match on all variants and fields. This ensures that, as code and types evolve, the compiler can warn about additions. This is easiest seen in an example:
#![allow(unused)]
fn main() {
enum Fruit {
    Apple { size: AppleSize },
    Banana,
}

// Bad
if let Apple {..} = fruit {
    println!("It's not yellow!")
}
}
This code looks fine, until we change our data types:
#![allow(unused)]
fn main() {
enum Color { Red, Green, Yellow };
enum Fruit {
    Apple { size: AppleSize, color: Color },
    Banana,
    Lemon,
    Grape,
}
}
This code is now broken in two ways:
- Apples can now be yellow, and the
..pattern means we will still say "It's not yellow" for them. - Grapes are never yellow, but we don't include a message for them since we used an
if let.
Instead, if the code had first been written as:
#![allow(unused)]
fn main() {
match fruit {
    Apple { size: _ } => println!("It's not yellow"),
    Banana {} => (),
}
}
Once the data types are updated, the code above will fail to compile, forcing us to deal with the new field and variants.
Safety
Panicking
- Avoid operations which silently swallow errors. Errors should be handled or escalated.
- Avoid panicking in shared library code (since a panic will break application code such as bots, services and cli tools). Instead, bubble up a Result::Err type.
- Panics can occassionally be allowed for truly exceptional cases that should never happen, but that should be rare and on a case-by-case basis.
- Generally avoid operations which can panic in contracts, since it makes debugging harder. This isn’t as all-encompassing as library code, since contracts do have an abort handler to catch panics, but it’s better to debug proper Result::Err types. Panicking is acceptable (and in fact encouraged) in test suite code, but it must be in code that does not get compiled with non-test code. (Real example:
Fromimpls in the message crate cannot include panicking, even if they’re only intended to be used from tests.) Some examples of panicking to be aware of:- Common methods like
unwrap() - Using
as-casts is generally dangerous, since it can either panic or truncate data. Instead, using things likex.into(),u64::from(x), ortry-variants likex.try_into()?andu16::try_from(x)?is preferable..intoandfromensure that a conversion is safe and lossless. - Arithmetic operations (unfortunately) can panic or overflow. It’s a bit of a grey area, but often times it would be better to use named methods like checked_add instead of
+. Then combined withanyhow, you can have code likex.checked_add(y).context("Unexpected overflow adding notional values")?.
- Common methods like
Strong typing
- Use
newtypewrappers when appropriate to enforce safe usage of values and ensure we don’t swap values of different meaning. For example, with time management, we have a customTimestamptype with an associatedDurationtype, which are both newtype wrappers aroundu64, but which represent different concepts (a point in time versus and amount of time). The operations on these types restrict you to only doing safe modifications (e.g. it’s impossible to multiply twoDurationvalues).- Be careful about adding too many helper methods and
impls that expose the innards of these types. Restricting what we can do is the whole point of strong typing!
- Be careful about adding too many helper methods and
- Favor using
enums andmatching to ensure we have identified all possible cases and handle them correctly. For example, a reasonable first stab at “how did this position close” could be something likeenum PositionCloseMethod { Manual { close_price: Number }, TakeProfit, Liquidation }.
Message structure
- Any messaging that comes to/from a client (e.g. not submessages) should use Typescript-friendly datatypes. For example, numbers should use a type that has a String serialization format (such as
Number), unless it is a 32 bits or lower (e.g.u32is okay,u64is not). - Messaging between contracts-only are free to use any serializable type without worrying about how it is represented over-the-wire.
Addrmeans “validated address”. Aside for tests, we should never haveAddr::unchecked. This means that in messaging from clients we useString, notAddr, and immediately validate it into anAddrbefore use (see next point about “edges”/”sandwich”). Messaging between contracts may useAddr, and we can therefore rely on not validating twice to save gas.- Conversion between client messaging and native Rust messaging should happen solely at the “edges”, like a sandwich, and all logic should be done in native Rust types. If there are data types which require unusual (de)serialization logic, such as representing a numeric ID as a JSON
String, provide customSerialize,Deserialize, andJsonSchemaimpls. - Named fields We should almost exclusively use named fields in message types, as this allows for extensibility in the future. For example, instead of
enum ExecuteMsg { Withdraw(Number) }, preferenum ExecuteMsg { Withdraw { amount: Number } }.
Optimization
- Prefer static dispatch over dynamic dispatch, to save gas, but be aware of implementing generic code for too many types and the impact on wasm size. For example, when possible, prefer concrete types or generic type parameters like
fn foo<T: SomeTrait>(t: T)orfn foo(t: impl SomeTrait)instead of trait objects likefn foo(t: &dyn SomeTrait). - If you know the size, or approximate size, of a
Vec, preferVec::with_capacityoverVec::new()orvec![].
Simplification
- Monomorphic code. When possible, prefer monomorphic code, avoiding type parameters and generalizing to traits. This is even more relevant for creation of new types and traits.
- Creating new types: do it, but monomorphize.
- Creating new traits: generally avoid it.
Shared Team Wallet
Overview
The shared team wallet can be used for resolving issues impacting the Perps mainnet. For example It can be used for:
- Opening positions to validate the trading for a market.
- Validating liquidity deposits and withdrawals.
- Cranking manually if bots are not functioning correctly.
- Exchanging one cryptocurrency for another when a specific token is needed for testing or operational activities.
Wallet Snapshot
Following is the list of crypto available in shared team wallet
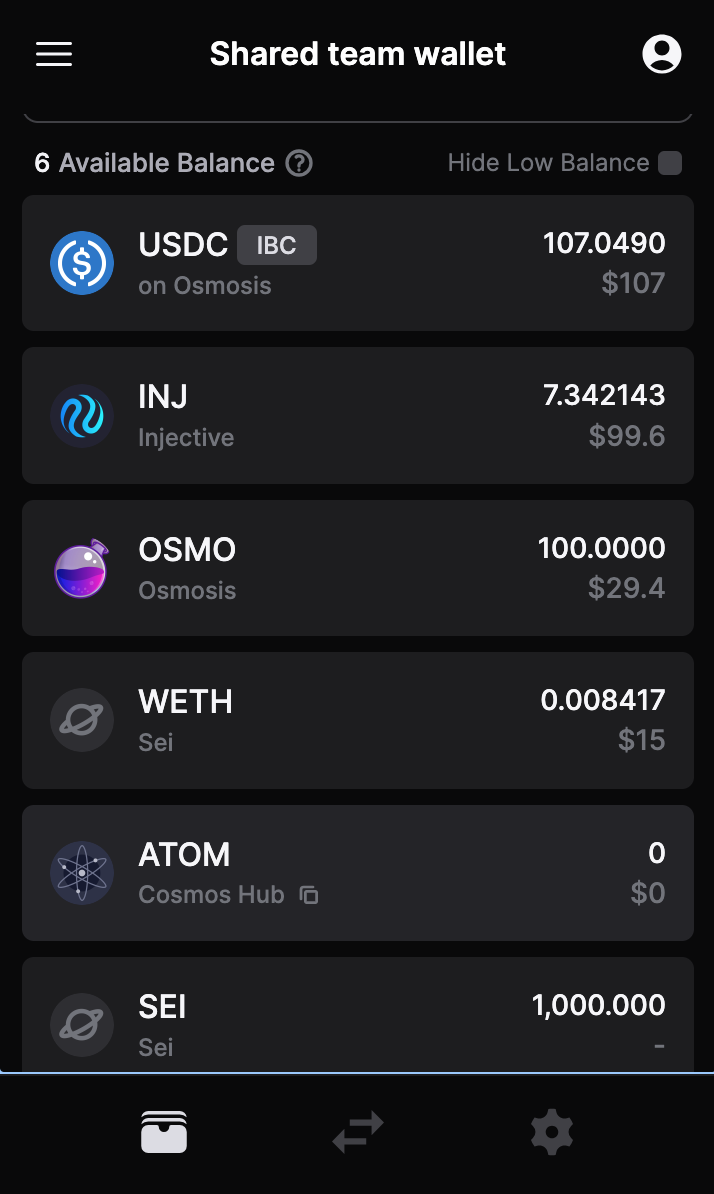
Accessing the Shared Team Wallet
Initiate Access Request
- Navigate to the Jira project titled 'User Feedback & Issues'.
- Create a new issue, selecting the type as 'Wallet Access'.
- Fill in all required fields, ensuring you provide a valid reason for needing access.
Receiving Access Credentials
- Once the issue is submitted, you will receive an email containing login credentials for Bitwarden. This email will be sent to the email address associated with your team profile.
- The email will provide you with a username and a unique password.
- Delete the email after accessing the credentials.
Logging into Bitwarden
- Once logged into Bitwarden with provided credentials, search for the item labeled 'Shared wallet seed'.
- You will find the seed phrase for the shared wallet.

Rules for Maintaining the Secrecy of the Wallet
No Direct Sharing: Do not share the seed phrase of the wallet directly with anyone, request them to follow the wallet access process described in this document.
Temporary Access: Access to the shared wallet should be considered temporary. Once your task is completed, avoid accessing the wallet unless it's necessary.
Report Suspicious Activity: If you notice any unauthorized or suspicious activity related to the shared wallet, report it immediately.
Things to keep in mind while testing
Use Minimal Amounts: While opening a position for validating try to use the smallest position size possible.
Close the position: Close the position immediately after verification, do not leave any test positions open for extended periods.
Withdraw Liquidity: If you need to verify a liquidity deposit, ensure you quickly return all deposited funds to the specified wallet
If a token needed for testing isn't in the wallet, exchange USDC for the necessary crypto. Please make sure to swap USDC for only the minimal amount required for testing.
Swapping USDC for Required Tokens on Osmosis
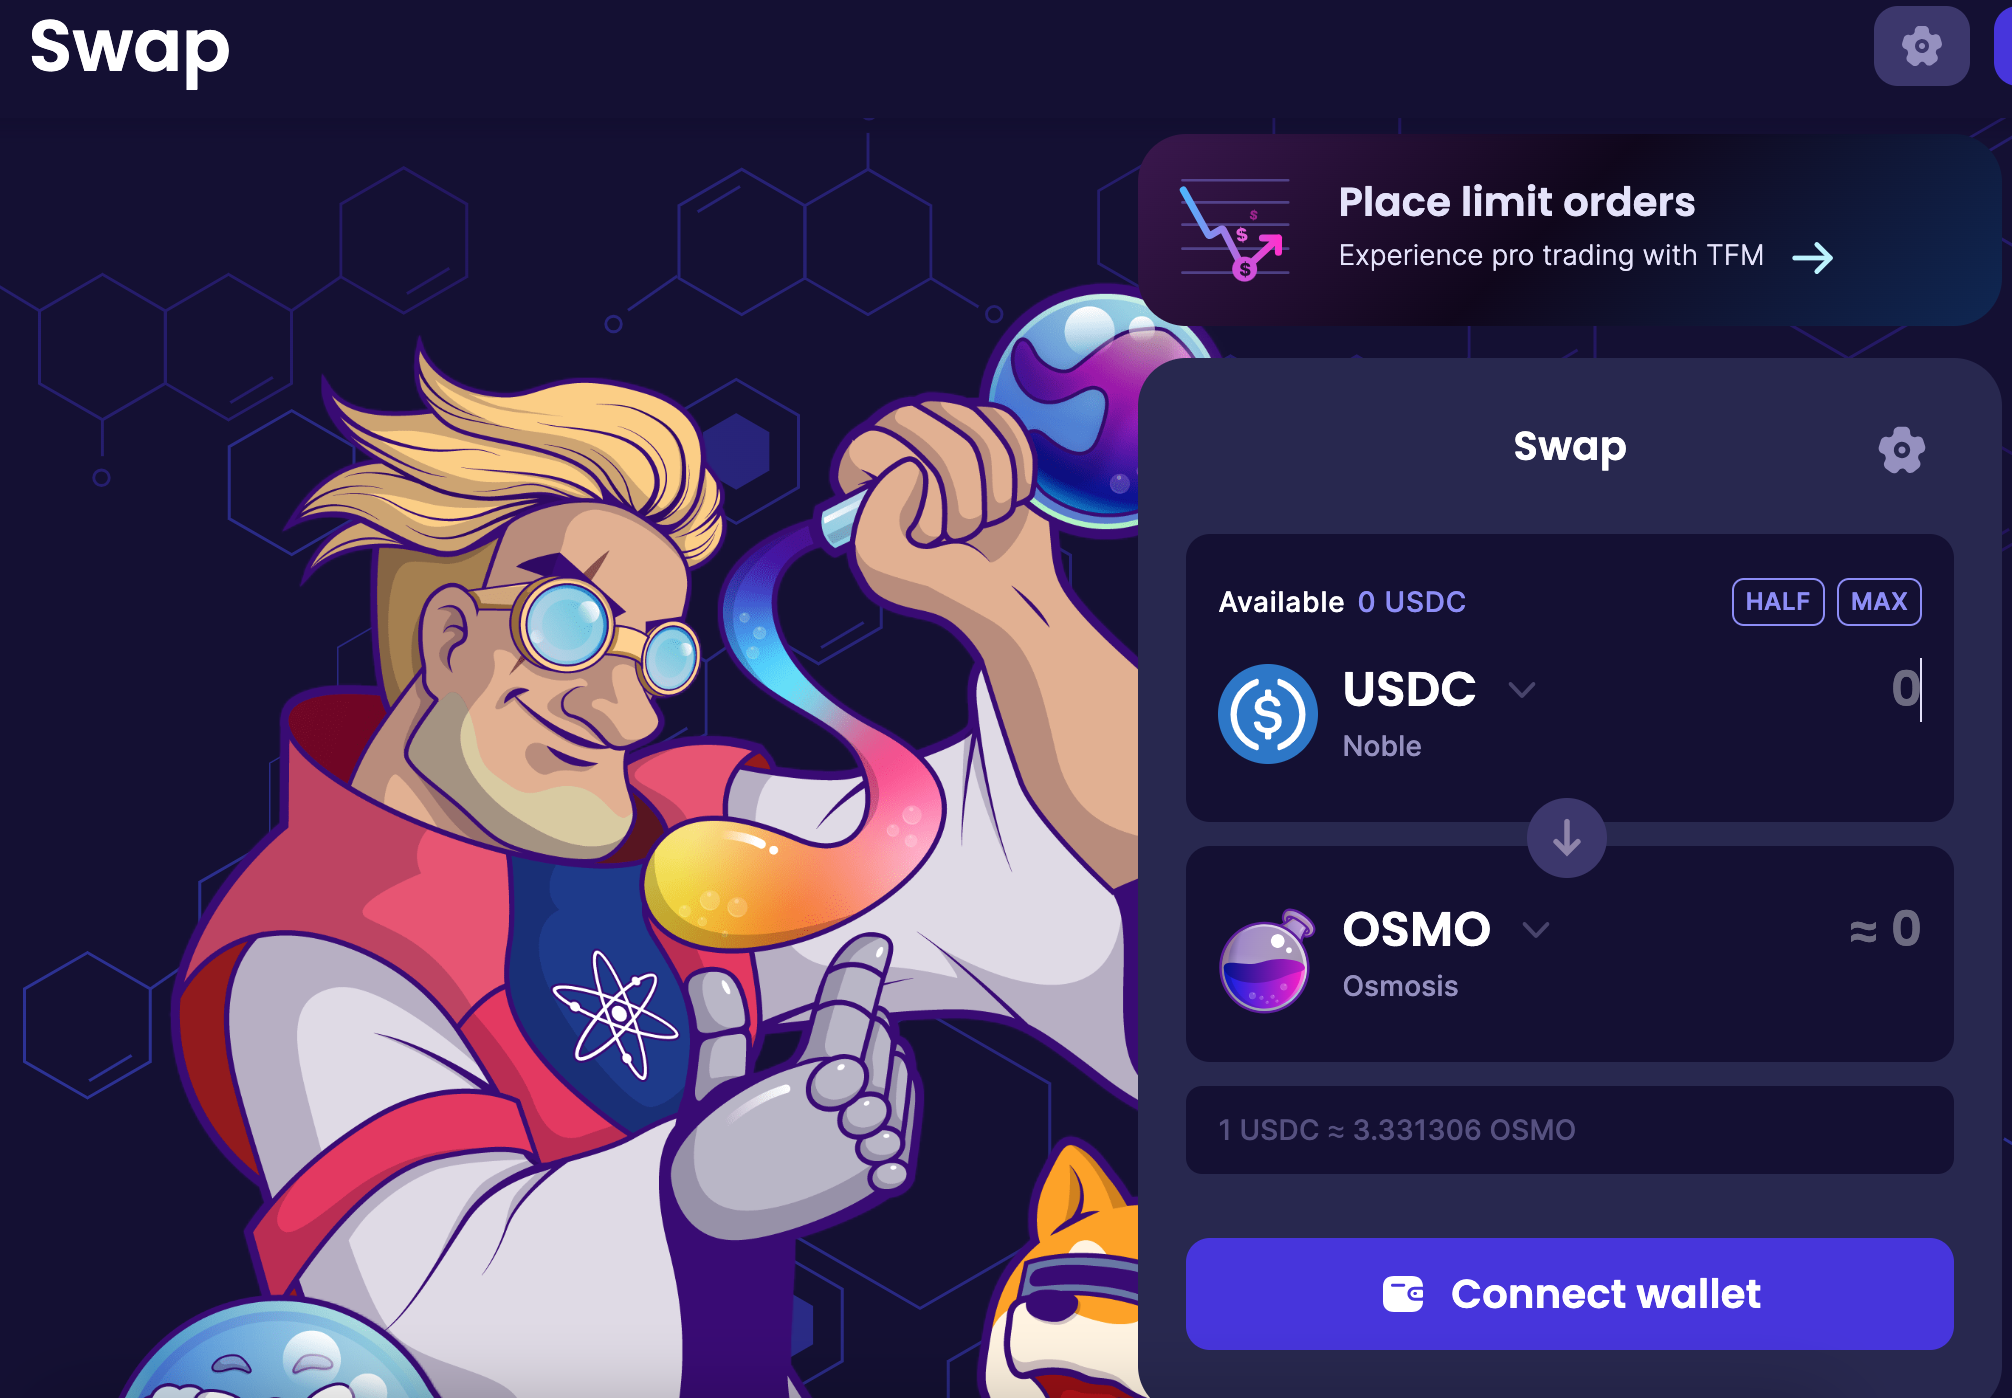
Access and Connect
- Navigate to the Osmosis web interface.
- Connect the shared team wallet (ensuring only authorized personnel have access).
- In the platform dashboard, go to the 'Swap' section.
- Set USDC as your input (or "From") currency.
- For the output (or "To") section, choose the desired token you need for testing.
- Specify the amount of USDC you intend to swap. The platform will showcase the expected amount of the chosen token you should receive based on current rates.
- A confirmation prompt from the wallet will appear. Validate and confirm the transaction.
Once the network validates the transaction, the chosen token will be available in the shared team wallet, while the swapped USDC amount will be deducted.
Static file hosting for Levana
If you have static files, such as images, PDFs, or data files, you can store these within Amazon S3 and have them publicly available on the static.levana.finance domain name. Ask Michael or Corey for access to upload files to S3 if needed.
S3 bucket
- We use the
static.meteors.levana.financebucket on S3. This is for historical reasons, a better bucket name would bestatic.levana.finance. - This bucket is part of the production Levana AWS account, not the sandbox account.
- If you have SSO access, you can log into the AWS account at https://levanafinance.awsapps.com/start#/.
- This bucket is set to be publicly accessible, though it is not recommended to directly use S3 addresses. Instead, you should use the static.levana.finance. If you really want to though, you can access files directly from S3 at URLs like: http://static.meteors.levana.finance.s3.amazonaws.com/cards/levana-exchange.png
Cloudflare Workers
- Within our Cloudflare account, there is a Cloudflare Workers job called
static. This job is responsible for downloading files over insecure HTTP from Amazon and hosting them on Cloudflare. - The Cloudflare DNS for this static.levana.finance. It automatically uses Cloudflare’s caching and geodistribution CDN to reduce egress costs from AWS and improve performance for end users.
Cloudflare Redirect
- We additionally have an assets.levana.finance domain name supported within Cloudflare.
- This domain has a redirect rule set up to automatically redirect any requests from assets.levana.finance to instead use static.levana.finance.
AWS Cloudfront
We used to have these files accessible via AWS Cloudfront. That is no longer the case. Historical information:
- Additionally, we have a domain name static.dragons.levana.finance that uses AWS Cloudfront to also serve the files from the S3 bucket.
- This service is more expensive than Cloudflare, since AWS charges for each individual request. Cloudflare provides the service for free and provides caching to avoid additional AWS charges.
- We still maintain this service because Cloudflare does not provide multilevel subdomain TLS certificates for free, and therefore cannot host on static.dragons.levana.finance.
- Future possibilities to further streamline:
- Update all code that referes to static.dragons.levana.finance to instead use static.levana.finance
- Set up a redirect within AWS from static.dragons.levana.finance to static.levana.finance
- Pay for Cloudflare’s Advanced Certificate Management feature ($10/month) and have the redirect live within Cloudflare
Infrastructure details
This page documents the infrastructure that we run for Levana.
Mainnet environment
IP address
These are our mainnet IP addresses (Useful if you want to send to a third party provider to whitelist us):
- 15.236.111.141
- 13.37.130.115
- 15.188.70.79
Sandbox environment
IP address
These are our sandbox IP addresses (Useful if you want to send to a third party provider to whitelist us):
- 13.37.60.74
- 15.236.65.131
- 15.236.227.192
Accessing AWS
Please see onboarding and offboarding guide for more information.
Introduction
This page documents on how to quickly check/get logs of a particular deployment.
This is usually needed to analyze a previous outage/alert or a current ongoing outage/deployment issue.
Pre-requisite softwares
- AWS CLI (Tested with 2.13.33)
- dateutils (Optional, useful for getting ArgoCD logs quickly. Provides
datediffutility)
ECS infrastructure
Get all services
❯ aws ecs list-services --cluster bots
{
    "serviceArns": [
        "arn:aws:ecs:eu-west-3:917490793656:service/bots/bots-injmainnet1",
        "arn:aws:ecs:eu-west-3:917490793656:service/bots/indexer-injective-raw-ingester",
        "arn:aws:ecs:eu-west-3:917490793656:service/bots/bots",
        "arn:aws:ecs:eu-west-3:917490793656:service/bots/querier-web-server",
        "arn:aws:ecs:eu-west-3:917490793656:service/bots/companion",
        "arn:aws:ecs:eu-west-3:917490793656:service/bots/indexer-rest-api",
        "arn:aws:ecs:eu-west-3:917490793656:service/bots/indexer-cache-populator",
        "arn:aws:ecs:eu-west-3:917490793656:service/bots/indexer-osmosis-raw-ingester",
        "arn:aws:ecs:eu-west-3:917490793656:service/bots/indexer-osmosis-processor",
        "arn:aws:ecs:eu-west-3:917490793656:service/bots/indexer-injective-processor"
    ]
}
Cloudwatch group name of services
These are the different log groups:
| Service name | Cloudwatch Group name |
|---|---|
| bots-osmosis | /aws/ecs/bots-osmosis/bots-osmosis |
| bots-injmainnet1 | /aws/ecs/bots-injmainnet1/bots-injmainnet1_app |
| indexer-injective-processor | /aws/ecs/indexer-injective-processor/indexer-injective-processor_app |
| indexer-injective-raw-ingester | /aws/ecs/indexer-injective-raw-ingester/indexer-injective-raw-ingester_app |
| indexer-osmosis-processor | /aws/ecs/indexer-osmosis-processor/indexer-osmosis-processor_app |
| indexer-osmosis-raw-ingester | /aws/ecs/indexer-osmosis-raw-ingester/indexer-osmosis-raw-ingester_app |
| indexer-cache-populator | /aws/ecs/indexer-cache-populator/indexer-cache-populator_app |
| indexer-rest-api | /aws/ecs/indexer-rest-api/indexer-rest-api_app |
| companion | /aws/ecs/companion/companion_app |
| querier-web-server | /aws/ecs/querier/querier |
You can view current logs like this:
❯ aws logs tail /aws/ecs/bots/bots --follow
You can also check logs from a specific time:
❯ export ECS_SERVICE="/aws/ecs/bots/bots"
❯ aws logs tail $ECS_SERVICE --follow --since "2023-11-01T18:44:00Z"
This is how you can get the proper UTC time from your local timings:
❯ date -u +"%Y-%m-%dT%H:%M:%SZ" -d "2023-11-02 12:14 AM IST"
2023-10-24T02:22:00Z
In general it will be helpful if you go back a couple of minutes from the instant you got alert to find the root cause. The above command can be executed in a single command like this:
aws logs tail $ECS_SERVICE --follow --since $(date -u +"%Y-%m-%dT%H:%M:%SZ" -d "2024-04-05 02:33 AM IST")
Explanation of Token Factory
The text below is intended to be generic enough to be copy-pasted into Telegram or elsewhere and shared with any integrators, such as CEXs or market makers. We should continue to refine it over time based on confusion we see from teams we work with.
LVN token, Osmosis, and Token Factory
On the Osmosis blockchain, the recommended approach for tokens is to use the native tokenfactory, which allows anyone to create their own native coin. This is different from Ethereum's ERC20 approach, or the CW20 standard in Cosmos (which is going away in favor of tokenfactory). The Osmosis team token factory docs are located at:
https://docs.osmosis.zone/osmosis-core/modules/tokenfactory/
In order to work with the LVN token, you don't interact with a smart contract. Instead, you use the chain's native "send coin" ability (MsgSend), and provide the denom for our LVN token:
factory/osmo1mlng7pz4pnyxtpq0akfwall37czyk9lukaucsrn30ameplhhshtqdvfm5c/ulvn
Here's a sample transaction of sending 4,499 LVN:
https://www.mintscan.io/osmosis/tx/1B8FA0BF6AADBB086030631C209A26E49D2948A59A2367E325F9AC0AAC8382AC
You can send LVN token on Osmosis in the same way that you would send the OSMO coin itself. You use the same MsgSend native coin transfer message, but instead of using the uosmo denom, use the factory denom above.
Network architecture and security
Overview
This graph focuses on the network architecture, using the querier as a sample service. An almost identical setup is used for the indexer and companion (share) servers, and slightly simplified versions for the bots (since they don't need to scale or handle incoming end-user traffic).
graph TD;
  User(Legitimate user)
  Attacker(Attacker)
  User-->Cloudflare(Cloudflare Ingress)
  Attacker-->Cloudflare
  Cloudflare-->CFRules(Does this look like an attack?)
  CFRules-->|Yes|CFMitigation(Cloudflare Attack Mitigation)
  CFMitigation-->Block
  CFMitigation-->Challenge(Managed Challenge)
  CFRules-->|No|CacheCheck(Is the data available in Cloudflare cache?)
  CacheCheck-->|Yes|CFCached(Serve cached data)
  CacheCheck-->|No|ALB(Amazon Application Load Balancer)
  ALB-->ALBIPCheck(Is this from a Cloudflare IP address?)
  ALBIPCheck-->|No|ALBDeny(Drop the connection)
  ALBIPCheck-->|Yes|TargetGroup(Amazon Target Group)
  TargetGroup-->|Choose ECS Task|ECSTask(ECS Task)
  ECSTask-->QuerierConcurrencyLimit(Are we beyond our concurent request limit?)
  QuerierConcurrencyLimit-->|Yes|QuerierLoadShed(Load shed the additional request)
  QuerierConcurrencyLimit-->|No|QuerierProcess(Process the request)
  QuerierProcess-->Kingnodes(Make a gRPC request to Kingnodes)
  Metrics(Amazon Health Metrics)-->|Check health|ECSTask
  Metrics-->|Check stats|ALB
  Metrics-->|Scale up or down|TargetGroup
Goals
- Provide high availability, even the in presence of machine failure
- Cache as much within Cloudflare as possible to reduce traffic to our services and Kingnodes
- Detect and block as many invalid requests (like DDoS attacks) within Cloudflare
- Do as little work on invalid requests within our services as possible
- Make it difficult to send cache-busting requests
- Scale up our services in response to increases in traffic
- Avoid overprovisioning (since it costs more), but use if necessary to handle bursty traffic
Cloudflare protections
TODO, need to pull from https://phobosfinance.atlassian.net/browse/PERP-2737
Amazon setup
We follow a fairly standard load balancer/auto-scaling group/node setup, but using Amazon ECS and Fargate instead of EC2 auto-scaling groups. We use various triggers to aggressively scale up and less aggressively scale down. We should review and document these triggers here. Right now, triggers include:
- High CPU utilization
- High memory usage
In-app protections
- We reject with a 400 status code any request with invalid query string parameters. This helps prevent cache busting.
- TODO We'd like to improve our Cloudflare protection to detect high levels of 400 responses and automatically block the offending client as an attacker.
- Some data is cached in memory within the querier. This is either to provide protection against node downtime, to improve performance, or to help mitigate DDoS attacks (by absorbing the traffic cheaply in the querier instead of more expensively by quering nodes).
- In addition to returning appropriate cache headers for each endpoint (with different cache duration depending on the data requested), all error pages also include cache headers to prevent the same invalid request from flooding our system.
- Request timeout on all requests. This may result in errors for users, but usually better than hanging connections. Of all features, this one is the least "protective," but still helpful and good for the end user experience.
- Global concurrency limit prevents more than a certain number of requests from being handled on a single node at a given time.
- Load shed will return an error status code when the global concurrency limit has been hit.
Concerns with global concurrent limit and load shed
The inspiration for using these comes from the blog post I won free load testing. As I understand it, the theory between these two things tying together is:
- By having a concurrency limit, we prevent the application from trying to do too much work at once, allowing it to more quickly handle a smaller number of requests at once, handle each faster, and get the backlog cleared out.
- By using load shedding, we prevent the application from being overwhelmed by too many active connections, allow the load balancer to redirect requests to other nodes, and allow a feedback mechanism to the auto-scaler to increase the number of nodes.
I'm concerned that our current setup is making things worse, not better. First issue: too low a concurrency limit. If we do this, we essentially defeat any possibility of our application handling bursts of requests. A number of requests during a sudden spike will be rejected immediately. That's good for DDoS attacks, but bad for normal usage. After such a situation arises, I think the following can occur:
- User browser receives the error message
- Browser immediately retries, possibly multiple times
- Instead of having a single request sitting in the queue for a bit of time, we have multiple requests touching all layers of our system, being rejected multiple times, a bad error for the end user, and more overall load on our system.
- More theoretical, but we're preventing the Amazon load balancer from properly doing its job of choosing which node to send requests to. It's supposed to handle the cases of requests taking too long to process on a node, and we're preventing that from kicking in. It may also adversely tie in to auto-scaling rules.
I think we should instead do the following:
- Drop load shedding entirely.
- Keep the global concurrency limit. I'm not sure what the number should be, but I'd err on the higher side.
- With these two changes, requests can now begin to pile up on an individual node waiting to be processed. They may end up getting timed out, but that's a more natural backpressure system for the load balancer.
- Try to refine the auto-scaling rules to detect slow response time and higher number of "request timed out" responses.
Attack vectors
- Sending so many requests to Cloudflare that it ends up overwhelming our load balancer in Amazon. (Load balancers can scale, but we've seen cases where they don't scale quickly enough.)
- Similarly, taking down our own services by getting enough requests past Cloudflare's DDoS protection and cache layer.
- And finally, similarly, getting our services to send too many requests to the node provider.
Engineering Processes
This page covers the processes we follow as an engineer team. The goal is to help improve communication around discussions and making decisions. As places for clarification arise over time, the contents of this page will grow. It's good to use this page as a reference when some additional clarity is needed.
Monitoring and alerting
What needs to be monitored
graph TD
  everValid(Is this event ever valid in the system)
  everValid-->|No|canBan(Can we prevent this event from ever occurring?)
  canBan-->|Yes|banInCode(Update code to make the situation impossible)
  banInCode-->canStillHappen(Are we concerned that this situation may still be possible?)
  canStillHappen-->|No|noAlertingNecessary(No alerting is necessary)
  canStillHappen-->|Yes|setUpAlert(Set up an alert)
  canBan-->|No|setUpAlert
  everValid-->|Yes|howCommonValid(How frequently will this event occur and be a valid state?)
  howCommonValid-->|Very infrequently|setUpAlert
  howCommonValid-->|At least somewhat frequently|designComplex(Design a complex monitor)
  setUpAlert-->canLevanaRespond(Can Levana reasonably respond to this alert condition?)
  canLevanaRespond-->|Yes|configureAlert(Configure the alert)
  canLevanaRespond-->|No|discussInternally(Discuss further internally)
  configureAlert-->teachTeam(Document and teach the team how to respond to such an alert)
The first step in monitoring a system is determining the events to look at. Generally, events that can be monitored fall into one of the following categories:
- Always invalid, and we can prevent them from being possible programmatically. Example: opening a position with someone else's funds. We don't need to configure an alert for such a situation, assuming we trust our code to behave as expected.
- Always invalid, but we can't guarantee it will never happen. Example: our frontend site goes down. We do everything possible to make our site resilient, but as we've seen even highly trusted entities like Cloudflare can have outages.
- Some versions of the event are normal, but may indicate a problem in the system. Example: traders taking profits. A single trader taking profits is expected. A single trader taking very large profits once? Probably expected. Do we need an alert for it? Maybe, maybe not. See the next section for details on this.
- The event is completely normal, and not even indicative of a problem. For example: trade volume increases or decreases by 5%. We may want to have business level stats to track this, but there's no monitoring event needed.
Another aspect to keep in mind for alerts is whether or not the team can do anything meaningful about them. For example, "the Osmosis chain is not accepting new transactions" would likely be something beyond Levana's control, but Levana could still notify the community, communicate with Osmosis to get updates, and set an emergency banner. Such an alert would make sense.
A final point to mention here is alert fatigue. Depending on where alerts are sent, they may wake people up, or at the very least make them spend significant time processing. Having too many alerts, and especially false positives, is dangerous and needs to be avoided. This is discussed more in the next section.
Where monitoring alerts are sent
We basically have four levels of where alerts can be sent:
- OpsGenie: the situation is so dire that, if it ever occurs, it warrants waking someone up to address it. (This level automatically implies that level (2) is warranted as well.)
#production-monitoring: this is the primary Slack channel for time-critical alerts. Alerts which don't necessarily warrant a wake-up, but do demand urgent action, should go here.- Alternative Slack channels: if urgent action and team-wide awareness isn't necessary, using separate Slack channels is good to avoid alert fatigue.
- Other collection system: this can apply to things like Sentry frontend errors, Amazon analytics, and more. The idea is that, in these cases, it's a proactive step for someone to decide to go and review these events.
The goal is that, if an alert ever lands in (1) or (2), the team will understand that this is important and should be handled.
How to handle complex monitoring requirements
Many topics that warrant alerting are complex. The December 26, 2023 exploit is a prime example of this. How do you set up a monitoring system to detect that? Some ideas:
- Look for the exact situation that occurred: someone opens and closes a position in a short period of time using older-than-expected price points for entry. This is great for detecting a known attack vector, but doesn't help much with unknown attack vectors. And for known attack vectors, the correct solution is usually not to monitor for it, but to instead prevent it from happening (as we've done with deferred execution).
- Raise an alert every time a trader takes profit. That's silly: the alert fatigue would be huge, and we'd lose the forest for the trees.
- Raise an alert every time a trader takes profit over a certain limit. It's a possibility, but (1) may often still lead to false positives and (2) may miss many attack vectors.
- Raise an alert when in aggregate profits over some period of time go above a certain level. This may work, but (1) finding the right parameters are very tricky and (2) the time period may be too long after the attack is successfully completed.
The point of this section isn't to say "this is how you monitor something complex." It's also not to say "it's impossible to monitor for complex situation." Instead, it's to point out: there are many cases where there are no easy wins. When we've identified such a situation, we need to:
- Set aside serious time to design the requirements
- Have technical brainstorming sessions involving relevant stakeholders
- Design and implement a solution
- Regularly review data manually and adjust our initial solution
Technical disagreements
There's an older and related document, originally from Notion but since migrated to this site: guideline to efficient technical discussions. This section is intended as a more direct guide for troubleshooting a broken discussion.
- Identify why each side is making their claims. Every stance should ultimately have a business need it's trying to address.
- Compare how each solution addresses those core business needs. If there are any gaps, identify them. In some cases, no solution will fully address all business needs, and it's ultimately a business decision around which trade-offs are acceptable.
- If a topic is contentious, and there are other decisions that can be made without making a decision on that topic, table the discussion until later.
- In emergency situations, taking short-cuts may occasionally be absolutely necessary, and it's worth calling those out explicitly.
- If you believe your proposal is not being considered fairly, your best course of action is to stop debating it and instead clearly articulate it. Often times, the process of clearly articulating will either convince the other side or reveal a flaw in your proposal. Both outcomes will be helpful in progressing the discussion.
- Do not repeat the same proposal. If a topic is contentious, and a proposal is not being accepted, continuing to raise it in future discussions, or slightly modified versions of it, is bad communication.
- If you're convinced that you are correct, that you've answered all objections from the other side, and you're still not making progress with more clearly aritculating the idea, you will need to resort to escalation: asking someone with more authority to intervene. Since this is Michael Snoyman writing, I'll say explicitly for myself: at any time, feel free to raise a concern directly with Jonathan. My recommendation is to consider carefully how you do this, and weigh what you believe are critical errors versus minor differences of opinion. Be sure to properly explain the motivations of whoever you're arguing with (e.g., me) to avoid strawman arguments and wasting more time.
- There are many valid ideas to be weighed when making a technical decision. These include, but are not limited to:
- What are the business needs?
- How complex will the implementation be? This is relevant because of both:
- Time to market/cost of implementation
- Risk to the project from making the change
- How familiar are we with the technologies involved? Even if an alternative technology seems like a better fit, familiarity with an existing approach is a very valid reason to stick with it. One simple reason why: you may be experiencing a "grass is greener" fallacy, and the new technology in fact has flaws you're simply not familiar with yet.
- How much code have we already written in a different direction? Not only is this about risks of change and costs, it's also about hidden requirements. When a codebase has been developed for a long time, it's common to have "old knowledge" baked in, resolution to issues you may not even remember having encountered in the past.
Guideline to efficient technical discussions
Technical discussions are a vital activity on an engineering team. They allow for knowledge transfer, enable the collaborative process, and provide a powerful feedback mechanism to—early in the development cycle—detect flaws in designs. However, technical discussions can also present problems to a team in terms of time wastage and becoming points of friction.
This document provides guidelines for healthy ways to have such technical discussions.
Clearly identify the purpose
Technical discussions should always serve a purpose on a team. They can be for planning a new feature, fixing a bug, simplifying the codebase, or something else entirely. Everyone needs to be on the same page about why we’re discussing something now.
There’s room for freeform technical discussions as well, simply for the fun of it. Engineers generally enjoy exploring interesting technical points. However, we should be clear that, if engaging in such discussions, there is not a specific purpose, and it is not intended to further product development.
Trace back to a product requirement
Every piece of work we do should ultimately trace back to something the product needs. If we can’t identify what product requirement drives the work we’re doing, we shouldn’t be doing the work. Period.
Speculative development in case we have a feature requirement in the future is almost always a bad idea and should be avoided. It will lead to unclear technical designs (due to unclear requirements), YAGNI (you ain’t gonna need it) code, higher maintenance burdens, and engineers trying to—in a vacuum—design a product requirement.
If an engineer is concerned that we may be writing ourselves into a corner with a design, and thereby making a future feature more difficult, the correct response is:
- Engineer calls it out to the engineering lead
- Engineering lead is responsible for communicating with product on roadmap and future requirements
- Engineering lead decides whether to explore the topic further with product, or take the requirement off the table for further discussion
Under no circumstances should code be written or designed around an unstated product requirement!
Text versus audio/video call
Text and calls are both valid forums for technical discussions, and both have advantages.
- Text advantages
- Easier to take time to clarify thoughts between messages
- Easier to explain ideas with code, diagrams, etc.
- Less disruptive to the workday
- Natural log of the discussion, allowing other team members to check in on the discussion without sacrificing their time, and easy reference in the future
- Call advantages
- Faster iteration
- Easier to clarify misunderstandings (usually)
- Higher bandwidth: people usually talk faster than typing and can use additional mechanisms to express ideas (hand gestures, tone of voice, etc.)
Be judicious about choosing one approach versus another. Generally, the best approach is:
- Start with a text prompt in a shared engineering channel
- Explore the ideas in text briefly, see if there’s easy consensus
- Identify if additional research is needed before discussing
- If the questions still exist at that point, jump on a call
Acknowledge counterpoints
An important aspect to technical discussions is to acknowledge counterpoints to your position. Specifically:
- What are the costs/disadvantages of the approach you’re suggesting?
- Are there other approaches, either advocated by a team member or by no one?
- If by a team member: repeat back to them what you believe they are advocating for to ensure no misunderstanding. Repeat back what you believe are the advantages to their approach.
- If no one has advocated a different approach:
- Steelman (opposite of strawman) the alternative approach
- If you can’t think of an alternative approach and no one else can either: maybe there’s nothing to discuss at all 😉
- There are a variety of means to assess how important an advantage or disadvantage is. Not all points are weighted equally! Just as some examples:
- It’s literally impossible to implement this for valid technical reason: really important
- I subjectively don’t like it but can’t enunciate why: not important
- This will have a high performance cost: important, but context matters. One-off batch job that will run for 20 minutes instead of 5 minutes? Stop talking, write the code, and have a 15 minute coffee break. Tight inner loop that will run thousands of times per second? Explore every nook and cranny.
- This reminds me of a problem we had before: not important on its own. Consider taking time to think through why it’s reminding you of a previous problem, and then tie that back to product requirements that may be impacted by this decision.
- Everyone else does it a certain way: semi-important. It’s a useful data point, but not a final decision. Sometimes communal wisdom is a good thing: it avoids common tarpits and makes code easier for people to understand. But if everyone is doing something stupid, make the argument that the emperor is naked.
Identify and accept core disagreements
Some times there will simply be a core disagreement that cannot be overcome. Identify and accept this. People has different preferences, wildly different experiences, and have been bitten by different bugs in the past. It’s completely reasonable to end with a disagreement on the path forward. In such cases:
- Judge how important the disagreement is to you. Engineers in general, and our team in particular, tend to overemphasize how vital each decision is. Really think through: if the “wrong” decision is made here, how bad will it be?
- Generally, we should follow a “dealer’s choice” approach. If two engineers disagree, the person writing the actual code makes the decision on the path forward. This is a practical matter: the person writing the code will be frustrated having to compromise their beliefs and write worse code, and will have a better understanding of how to take their approach to writing code.
- If a disagreement is so important that an engineer cannot allow “dealer’s choice” to win, raise it to the engineering lead to make a decision. And then move on: further discussion is not needed.
I’m going to reiterate something because it’s a perennial problem: discussions need to finish sooner than they do currently. The priority for our team is to deliver product, not to discuss how to deliver product. We probably need the equivalent of a safe word to exit a discussion. I propose “OK, decision time.”
Ensure the right people are involved
There’s a difficult tightrope to walk between involving too many and too few people in a discussion. Both have costs:
- Cost of too many people:
- Discussions are more difficult to manage
- More time spent sharing context that the core team may already understand. (Extreme example: bring a non-developer into the discussion and begin explaining what a deadlock is to bring them up to speed.)
- Disrupts people’s ability to deliver their actual work
- Cost of too few people:
- Valuable insight may be lost
- Someone may feel left out and frustrated that a decision was made without them.
- Note: This attitude overall needs to change. We cannot have a design-by-committee team. Some decisions will be made by a smaller group of people and explained afterwards. Questions are valid, and redesign may be necessary. But those cases should be far fewer than we’re actually seeing.
One easy rule to put in place: dev sync is not the time for this. Dev sync is a short daily meeting to update the team on progress. Detailed technical discussions may not occur there.
Document outcomes
Outcomes must be documented. This is especially relevant to technical discussions held in calls, but applies to text based discussions as well. This ensures that the people involved in the discussions walked away with the same understanding, and allows the rest of the team to get a summarized version of the decisions.
Documenting does not mean writing a long detailed document exploring everything. It can be a short one-line sentence in Slack, a comment in Jira, an inline comment in the codebase, or something else. For example:
- We decided that hCaptcha logic should live in the frontend code itself and not in the SDK
- We’re going to flatten our file structure by moving foo.txt to the root directory
Discord mod status reports
This document has been moved to Google Drive: Google Drive - Discord mod status reports.
Defi Llama
Levana is currently indexed on DefiLlama for both TVL and Volume. These are completely separate repositories with different considerations.
TVL
- Viewable at https://defillama.com/protocol/levana-perps
- Configured via the repo at https://github.com/DefiLlama/DefiLlama-Adapters
TVL is calculated as the wallet balance of a market contract, and the only funds that market contracts allow depositing are collateral tokens.
Therefore, the process for calculating TVL is ultimately:
- For each market, get the balance in collateral
- Convert from collateral to USD
- Sum it all up
This needs to be done from the DefiLlama tool and Perps tool, then the final values can be compared.
If there is a significant discrepency between DefiLlama and Perps, then the next step is debugging, which requires reporting the specific per-market logs to a developer.
Running the Levana TVL calculation tool
in the levana-perps repo:
cargo run --bin perps-deploy util tvl-report ~/Downloads/tvl-report.csv
(of course, you may want a different file output than "~/Downloads/tvl-report.csv", adjust accordingly)
This will write a CSV log of each market's TVL as both collateral and USD
Running the DefiLlama TVL calculation tool
The DefiLlama tool is meant to be used by their indexer and does not support inherent debugging.
Therefore, we maintain a debug branch of our fork
After cloning that, run the test tool just like in the main README:
node test.js projects/levana/index.js
In addition to the usual DefiLlama info, this will log out additional debug data, including the collateral balance per market and USD balance per market. The collateral balance will not have decimal places, as they are in the raw wallet units.
The action item is typically to compare this output to the Perps tool, and note any major differences.
Here's an example comparing the two for ETH_USD on SEI:


(it would be nice to update these logs to also write to a CSV, to make some comparisons easier. As of this writing, that remains to be done).
There will likely be some difference, due to the inherent difference between Pyth prices and DefiLlama prices (in fact, for Pyth alone, there is a significant difference between the regular price and the ema/averaged price).
The following is optional and not typically required for support engineer reports
In case there seems to be some massive difference in USD price, the DefiLlama USD price can be queried directly.
In order to construct the url, the denom must be taken from the "market to denom" mapping, and then appended with the chain name and separated by commas.
For example, if SEI_USD has the denom of "usei" and ETH_USD has the denom of "factory:sei189adguawugk3e55zn63z8r9ll29xrjwca636ra7v7gxuzn98sxyqwzt47l:4tLQqCLaoKKfNFuPjA9o39YbKUwhR1F8N29Tz3hEbfP2"
then the USD price query on DefiLlama becomes:
https://coins2.llama.fi/prices/current/sei:usei,sei:factory:sei189adguawugk3e55zn63z8r9ll29xrjwca636ra7v7gxuzn98sxyqwzt47l:4tLQqCLaoKKfNFuPjA9o39YbKUwhR1F8N29Tz3hEbfP2
Volume
- Viewable at https://defillama.com/derivatives/levana-perps
- Configured via the repo at https://github.com/DefiLlama/dimension-adapters
The approach for Volume is theoretically similar to that of TVL, however in this case there is no native chain querying - both the Perps frontend and the DefiLlama tooling hit the same indexer endpoint.
That said, the DefiLlama tool doesn't necessarily use "now" for the timestamp, and it also doesn't log each output per-market.
Therefore, we maintain a debug branch of our fork
After cloning that, run the test tool just like in the main README:
yarn run test dexs levana
(note - you may need to use npm instead and edit the test command in package.json... this change is not checked into the repo, however)
This will log out the per-market volume and total market volume, alongside the final DefiLlama summary.
The action item is typically to compare this output to the Perps frontend, and note any major differences.
Here's an example comparing the total volumes for all markets on SEI:


and another example comparing just the ETH_USD markets on SEI:


Adding pool incentives
Incentives are added to Osmosis pools using the osmosisd commandline tool.
Specifically, it's the tx incentives create-gauge subcommand.
Official documentation is here: https://docs.osmosis.zone/overview/integrate/incentives/#creating-an-external-incentives-gauge
The values you need to know are:
- Pool ID
- Pool type ("supercharged" or "classic")
- note: "supercharged" is sometimes called "concentrated liquidity"
- Start date
- Duration, in days (or more accurately, "epochs")
- Amount of LVN
- For "classic" pools only: lockup duration (Osmosis recommendation is 14 days)
You also need to have setup osmosisd to target mainnet with a valid wallet.
We typically use the shared "pool-creator" wallet, so make sure enough LVN has been sent to osmo13etjyg0xusvf2leu7zljndvvavyjdq74gs6hw0
Current pool ids
- LVN/OSMO (supercharged): 1325
- LVN/USDC (supercharged): 1337
- LVN/ATOM (classic): 1389
Epoch conversion
Aim for 16:30 UTC on the given date, which is a bit before the epoch. This needs to be converted into a Unix Timestamp. A good site for this is https://www.timestamp-converter.com/
Here's how to use it:

LVN Amount
The LVN amount is denoted as:
{AMOUNT}factory/osmo1mlng7pz4pnyxtpq0akfwall37czyk9lukaucsrn30ameplhhshtqdvfm5c/ulvn
Where amount is in micro-units, i.e. there are no decimals, rather it's an integer with the decimal shifted over 6 places
For example, 37.5K LVN would be expressed as:
37500000000factory/osmo1mlng7pz4pnyxtpq0akfwall37czyk9lukaucsrn30ameplhhshtqdvfm5c/ulvn
Example commands
Ultimately, the idea is just to follow the official Osmosis documentation. But be careful of the difference between "classic" and "supercharged"
Let's say we want the following values:
- Start date: March 5th
- Duration: 90 days (i.e. 3 months)
- Amount of LVN: 150K
- Lockup (for classic only): 14 days (the recommended amount)
First we go to the epoch converter and figure out that 16:30 UTC on March 5th is 1709656200
Note that supercharged has 0 for the lockup_denom, while classic has 0 for the poolId
That gives us the following
LVN/OSMO:
osmosisd tx incentives create-gauge 0 150000000000factory/osmo1mlng7pz4pnyxtpq0akfwall37czyk9lukaucsrn30ameplhhshtqdvfm5c/ulvn 1325 --epochs 90 --start-time 1709656200 --from pool-creator --gas=auto --gas-prices 0.01uosmo --gas-adjustment 1.5
LVN/USDC:
osmosisd tx incentives create-gauge 0 150000000000factory/osmo1mlng7pz4pnyxtpq0akfwall37czyk9lukaucsrn30ameplhhshtqdvfm5c/ulvn 1337 --epochs 90 --start-time 1709656200 --from pool-creator --gas=auto --gas-prices 0.01uosmo --gas-adjustment 1.5
LVN/ATOM:
osmosisd tx incentives create-gauge gamm/pool/1389 150000000000factory/osmo1mlng7pz4pnyxtpq0akfwall37czyk9lukaucsrn30ameplhhshtqdvfm5c/ulvn 0 --duration 336h --epochs 90 --start-time 1709656200 --from pool-creator --gas=auto --gas-prices 0.01uosmo --gas-adjustment 1.5
Admin procedures
- Uploading new mainnet contracts
- Migrate to new contracts
- Granting store code permissions
- Manual proposal execution
- Update Multisig addresses
Uploading new mainnet contracts
- Get the Git hash of the revision you want to upload. Let's pretend it's
3961e46752bbe7c0a2560e0fe22f538e0ad75fc9. - Locally check out the correct revisions of the perps repo.
- Run the full test suite with
just cargo-full-check. - Build the WASM contracts with
just build-contracts. The resulting files will be inwasm/artifacts. - Store the contract code on the destination chain and get the code ID. See sections below for details.
- Store information on the uploaded code in the YAML config files by running
cargo run --bin perps-deploy mainnet store-perps-contracts --network injective-mainnet --to-upload market --code-id CODE_ID. You can upload market, factory, liquidity-token, and position-token contracts this way. - Generate the exports for the docs repo with
.ci/make-source-tarball.sh3961e46752bbe7c0a2560e0fe22f538e0ad75fc9. This will produce two new files in thesource-tarballs` directory: levana-perps-3961e46752bbe7c0a2560e0fe22f538e0ad75fc9.tar.gz and levana-perps-3961e46752bbe7c0a2560e0fe22f538e0ad75fc9-checksums.txt. - Upload the two generated files to s3://static.meteors.levana.finance/perps-source/.
- You can use the
.ci/upload-source-tarball.shscript to automate this step and the following one.
- You can use the
- In the docs repo, add a new line to the
src/source-code.mdfile with the new revision.
At this point, you can now migrate to new contracts.
Uploading to Sei
Uploading to Sei is simple: it's a permissionless chain and does not have gas or size limits that impede us. However, the gRPC endpoints do seem to have some trouble, so we use a cosmjs/TypeScript/RPC approach instead.
- Within the perps repo, go to the subdirectory
packages/perps-exes/cosmjs - Run
yarn upload:sei-mainnet(optionally runningyarnfirst to install dependencies)
You should get back the code ID.
Uploading to Injective
Injective is a permissioned chain that we cannot upload to. Instead, we need to ask for help from Achilleas in our shared Injective Slack channel. Send him a ZIP file with the WASM files and he'll upload them and give you a code ID.
Uploading to Osmosis
This is by far the trickiest. Currently, the default config for all nodes will disallow a store code transaction from entering mempools, and therefore broadcasting to a node won't work. We've asked the Osmosis team to change defaults, but haven't gotten positive responses yet. For now, our very broken process is:
- CrosNest runs the Levana validator node. Reach out to them on Telegram and tell them we need to upload a new contract. They will need to:
- Expose an RPC endpoint (https://rpc-levana.cros-nest.com)
- They turn off the extra high availability nodes in the validator set
- Once they've done that, we can broadcast our store code message directly to that node. However, because Osmosis is permissioned, we need to use an approved uploader, which also means we need to use a
MsgAuth. This is all handled byyarn upload:osmosis-mainnetwithinpackages/perps-exes/cosmjs. See granting store code permissions for details. - Confirm that the transaction has landed in the
/unconfirmed_txsfor the RPC node. - Wait for our validator to propose a block with our transaction. Easiest way to do this is to check Mintscan for the wallet you used for broadcasting that transaction.
- When the transaction lands, ask CrosNest to return their cluster to its normal state, and then get the code ID from the transaction.
Migrate to new contracts
Once the code is uploading to the chain, we migrate using the multisig contracts. Run a command like the following (replacing code IDs, adding additional ones if needed -- use --help to get all args):
cargo run --bin perps-deploy mainnet migrate --factory injmainnet1 --market-code-id 585
This will print out information on the multisig contracts and messages that need to be placed against them. Follow normal multisig procedures for that.
Granting store code permissions
Levana has a single multisig wallet which is approved for upload: osmo1lqyn9ncwkcqj8e0pnugu72tyyfehe2tre98c5qfzjg4d3vdw7n5q5a0x37. However, it isn't feasible to upload directly via a multisig. Instead, we have the multisig pass a proposal to grant a hot wallet upload permissions via Cosmos's authz system.
The cosmos CLI tool from our levana-cosmos-rs repo provides a built in command for generating cw3 grant message, which looks like this:
cosmos authz cw3-grant --granter osmo1lqyn9ncwkcqj8e0pnugu72tyyfehe2tre98c5qfzjg4d3vdw7n5q5a0x37 --grantee osmo1e2r98hpf3eer8pfpcrsprmrx5vpfq8jp5we88a --duration 90d store-code
Then make a normal multisig proposal with the output.
Manual proposal execution
Generally the process for a multisig proposal happens inside either Apollo Safe or Smart Contract GUI: make the proposal, vote on it, and execute it. Doing these steps from the command line is difficult and/or impossible, since we generally use Ledgers for performing the signing, and our CLI tooling doesn't (currently) support Ledger.
However, there are two cases where this requirement is relaxed:
- Executing a proposal that has already passed can be done with any wallet, not just one of the signers. So executing with a hot wallet is possible.
- On Injective, our multisigs use hot wallets since there isn't (or at least wasn't) support for Ledger on Injective.
If you run into trouble using one of the web UIs for executing a proposal, you may need to execute it from the command line. This happens most often with Injective, where the gas amounts chosen in the Apollo Safe UI are usually wrong.
To manually execute a proposal, follow these steps:
- Identify the proposal ID and multisig contract address. This can often be determined from the Apollo Safe URLs. For example, the proposal https://safe.apollo.farm/injective-1/inj1499cv9umkqt87ajyakr0k3ymjdf5kpg8nks6er/proposals/21 is proposal ID 21 on multisig contract address
inj1499cv9umkqt87ajyakr0k3ymjdf5kpg8nks6er. - Install the Cosmos CLI tool.
- Run a command like the following:
COSMOS_NETWORK=injective-mainnet COSMOS_WALLET="some seed phrase" cosmos execute-contract inj1499cv9umkqt87ajyakr0k3ymjdf5kpg8nks6er '{"execute":{"proposal_id":21}}'
When I run the command above (with a valid seed phrase), I get the following error message:
Error: On connection to https://sentry.chain.grpc.injective.network, while performing:
simulating transaction: Message 0: inj12jn8c3gxf9gf3p4xczqeh4xn2k55zcj87gpsv9 executing contract inj1499cv9umkqt87ajyakr0k3ymjdf5kpg8nks6er with message: {"execute":{"proposal_id":21}}
Status { code: Unknown, message: "failed to execute message; message index: 0: Proposal must have passed and not yet been executed: execute wasm contract failed [!injective!labs/wasmd@v0.45.0-inj/x/wasm/keeper/keeper.go:401] With gas wanted: '50000000' and gas used: '120055' ", details: b"\x08\x02\x12\xf2\x01failed to execute message; message index: 0: Proposal must have passed and not yet been executed: execute wasm contract failed [!injective!labs/wasmd@v0.45.0-inj/x/wasm/keeper/keeper.go:401] With gas wanted: '50000000' and gas used: '120055' \x1al\n(type.googleapis.com/google.rpc.ErrorInfo\x12@\n\x1cexecute wasm contract failed\x1a\r\n\x08ABCICode\x12\x015\x1a\x11\n\tCodespace\x12\x04wasm", metadata: MetadataMap { headers: {"alt-svc": "h3=\":443\"; ma=2592000", "content-type": "application/grpc", "server": "Caddy", "set-cookie": "lb=061ead0bb10c2fa962e89cc3b6e5ee864437639a384a0eca6005ece9502eb9a1; Path=/", "x-cosmos-block-height": "65626049", "date": "Tue, 09 Apr 2024 07:32:34 GMT"} }, source: None }
Height set to: None
Health report for https://sentry.chain.grpc.injective.network. Fallback: false. Healthy: true. No errors. First request: 2024-04-09 07:32:34.171102793 UTC (Since 0 minutes). Total queries: 2 (RPM: since is 0)
Note that the error messages from the CLI tend to be much more meaningful than what you get from Apollo Safe. And in this case, the message makes perfect sense: since this proposal was already executed, we can't execute it a second time.
Update Multisig addresses
You might have to update the MultiSig addresses if you would want to remove or add a specific member. These are the steps:
- Get the wallet address of member that needs to be
added/removed. Let's assume we are going to add
neutron1cpy2gpwc8lphzyczderwma2rt5nqdmvtyyl26fand removeneutron17s76s29nyuu5p6xaqz0sndw3sgl78hy4gqm342. - Find out which multisig address that you want to modify. Let's
assume we are going to do it for kill switch multisig. In that
case, find the CW4 group contract address for Kill switch. Let's
assume in our case that is
neutron19539madyfvjla97j4mc86a3p7t78g66pm2cat6ep7ug4mvcnkscsluagmj. - Create the multisig message using the cosmos cli:
$ cosmos cw3 update-members-message --add neutron1cpy2gpwc8lphzyczderwma2rt5nqdmvtyyl26f --remove neutron17s76s29nyuu5p6xaqz0sndw3sgl78hy4gqm342 --group neutron19539madyfvjla97j4mc86a3p7t78g66pm2cat6ep7ug4mvcnkscsluagmj
{"wasm":{"execute":{"contract_addr":"neutron19539madyfvjla97j4mc86a3p7t78g66pm2cat6ep7ug4mvcnkscsluagmj","msg":"eyJ1cGRhdGVfbWVtYmVycyI6eyJyZW1vdmUiOlsibmV1dHJvbjE3czc2czI5bnl1dTVwNnhhcXowc25kdzNzZ2w3OGh5NGdxbTM0MiJdLCJhZGQiOlt7ImFkZHIiOiJuZXV0cm9uMWNweTJncHdjOGxwaHp5Y3pkZXJ3bWEycnQ1bnFkbXZ0eXlsMjZmIiwid2VpZ2h0IjoxfV19fQ==","funds":[]}}}
- Find out the CW3 Flexible Multisig contract address which has been deployed for the kill switch (These details are usually present in Spreadsheet that Michael and others have access to). This is the contract address that you should use to send the above message to.
Managing backend services
We maintain three sets of backend services:
- Testnet ECS: where the testnet services run
- Mainnet ECS: where the real mainnet services are run
One final complication to mention: the services in testnet ECS often run for both testnet and mainnet, while the mainnet/ECS services are exclusively for mainnet.
ECS mainnet
ECS is Amazon's Elastic Container Service.
The only two people on the team who can deploy ECS mainnet changes right now are Michael and Sibi. Deployments are managed in the devops repo, in the terraform/mainnet subdirectory. All services are managed via Terraform. There are docs in the repo, and justfiles for simplifying common tasks.
Team members that want to review the health and logs of ECS mainnet services should follow these steps:
- Log in at https://levanafinance.awsapps.com/start/
- Choose one of the roles under "Levana Perps Mainnet". Different team members will have different roles available, but "PowerUserAccess" and "ReadOnlyAccess" will both give access.
- Choose "Elastic Container Service."
- Choose the "bots" cluster.
- Choose the service you want to review, e.g.
querier. - From this area, you can select health reviews, look at logs, inspect individual tasks, etc:
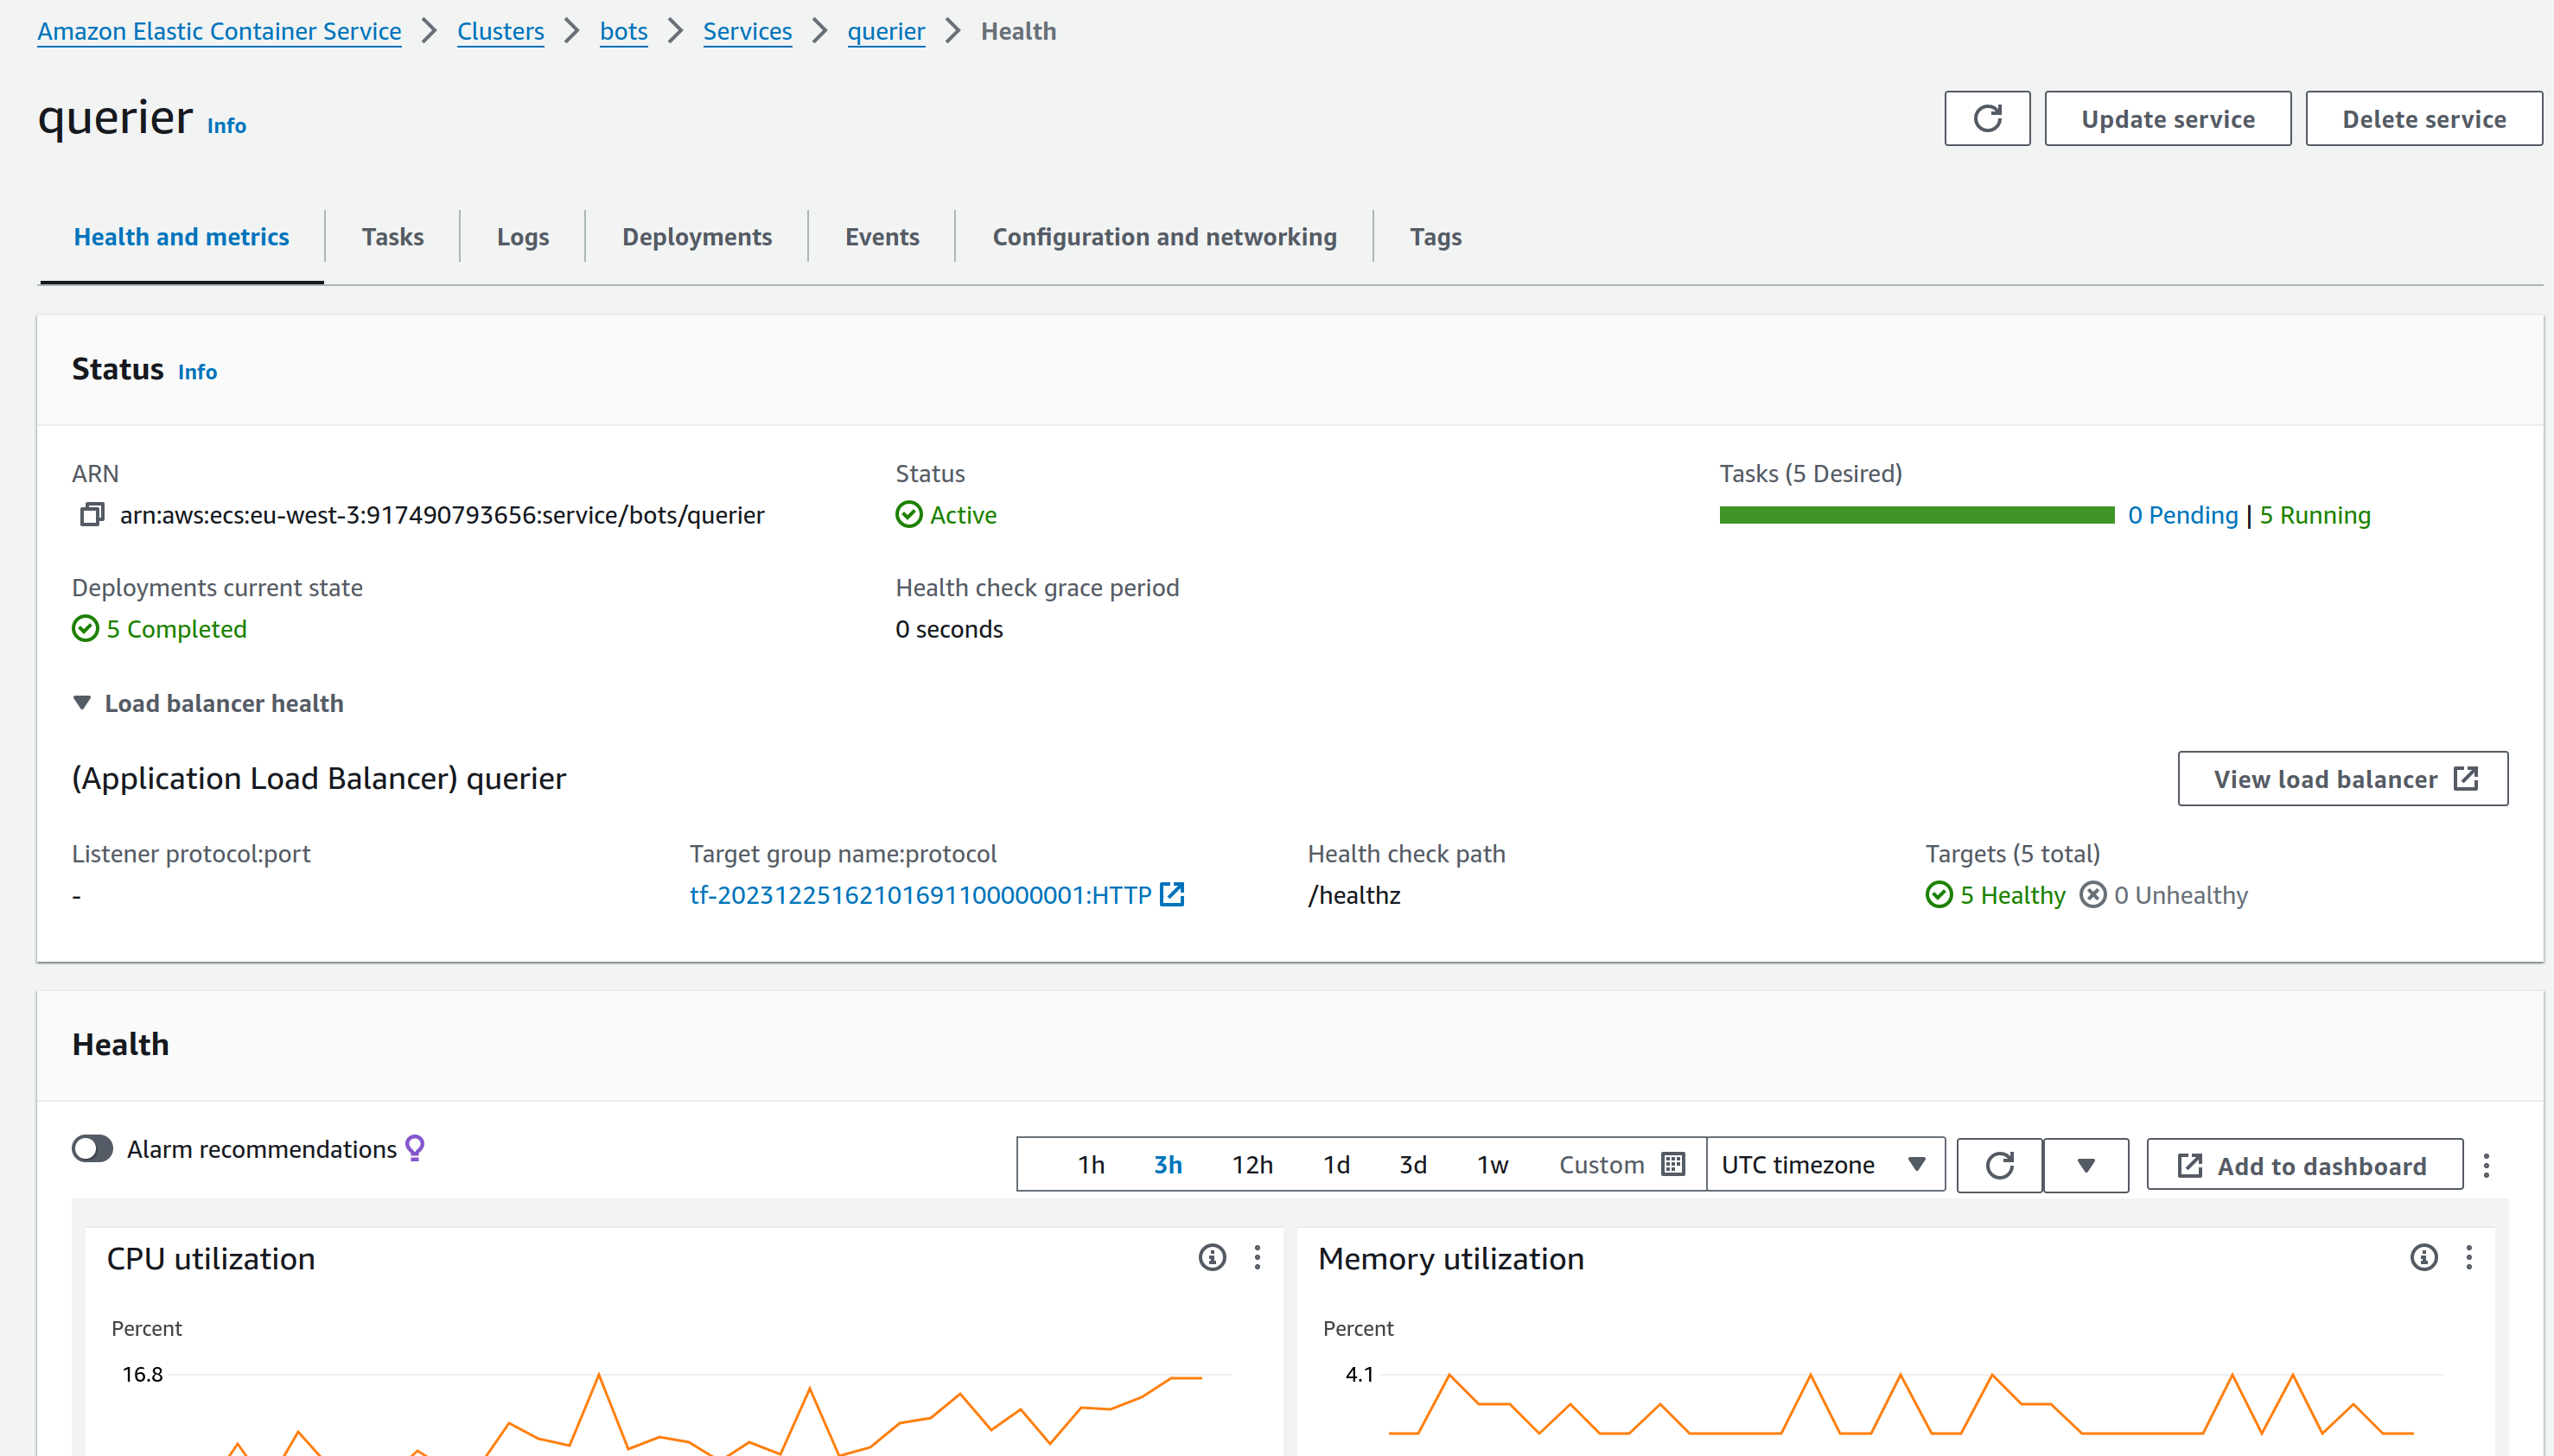
ECS testnet
This is pretty much similar to the above section with the following differences:
- Nearly all team members have full access to do deployment.
- The ECS cluster is named
testnet - For details on how to deployment, refer the documentation here.
Onboarding and offboarding staff
This page contains a list of all services staff members can be added to. For all new members joining, and any team member leaving, please go through this list and make sure appropriate accounts are created or removed as necessary.
- Levana's Google Workspace
- Levana Slack
- GitHub org levana-protocol
- Discord
- ZenDesk
- Atlassian account - Jira and OpsGenie
- Cloudflare
- Sentry
- Ticketsbot (Discord support)
- AWS (both standard IAM and SSO/IAM Identity Center)
- UptimeRobot
- Telegram groups
- Notion
AWS IAM Identity Center
AWS provides (at least) two different ways of logging in:
- AWS IAM
- AWS IAM Identity Center (formerly known as AWS SSO, which is what I'll call it here)
AWS IAM has a lot of pain points for normal users. The current setup at time of writing is:
- Very few people has AWS IAM accounts, just Corey and Michael S. Both of them have admin access.
- Every other team members gets AWS access through AWS SSO.
For onboarding and offboarding, ask Michael or Corey to add a user in AWS SSO. Login details for the two different methods of logging in:
Guide for sending the trading and losses incentives and referral rewards
This guide will walk you through the process of generating the distribution CSV for the trading and loss incentives and referral rewards("rewards"), committing it to the repository, and executing the distribution.
Confirm pool sizes and referral reward percentage
Before running the scripts, confirm the following parameters with Jonathan:
- Losses Pool Size: Typically set to 50000.
- Fees Pool Size: Typically set to 50000.
- Referee Rewards Percentage: Typically set to 50%.
Ensure that these values are accurate and approved by Jonathan before proceeding.
Generate the Distribution CSV File
Once you have confirmed the parameters, you can generate the distribution CSV file using the following command:
cargo run --bin perps-deploy util trading-incentives-csv --losses-pool-size 50000 --fees-pool-size 50000 --referee-rewards-percentage 50
This command will generate the CSV file with the specified parameters and automatically save it in the appropriate directory within the repository.
Troubleshoot
When the default osmosis grpc endpoint (https://grps.osmosis.zone) does not respond properly, it will throw an error when running the above command.
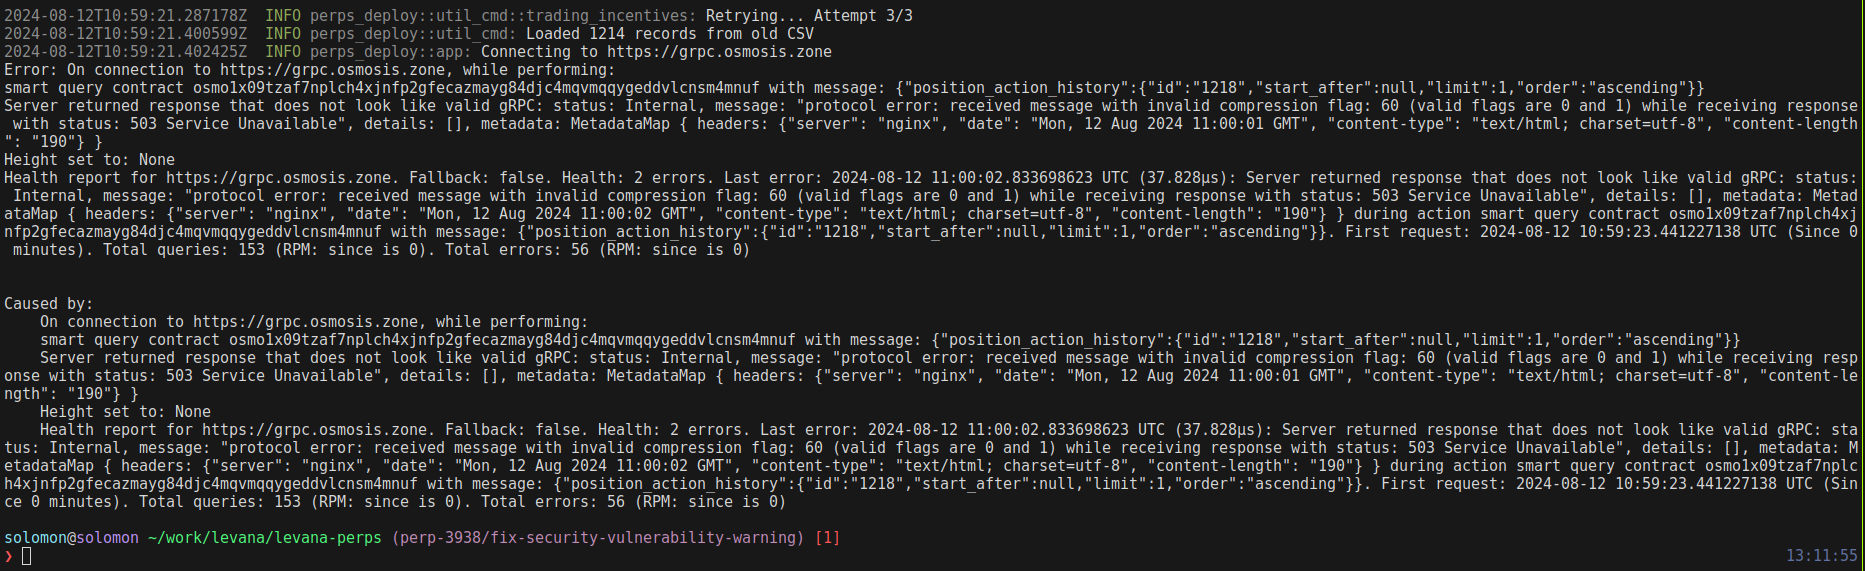
Here's the config for osmosis-mainnet to handle this issue.
osmosis-mainnet
Primary endpoint: https://osmo-priv-grpc.kingnodes.com
Fallback #1: https://c7f58ef9-1d78-4e15-a818-d02c8f50fc67.osmosis-1.mesa-grpc.newmetric.xyz
Fallback #2: https://grpc.osmosis.zone
Fallback #3: http://osmosis-grpc.polkachu.com:12590
If you install a recent version of the cosmos CLI, you can set these values by using cosmos config subcommand.
Output Example
The generated file typically saved as:
data/rewards/YYYY-MM-DD-trading-incentives.csv
Make sure to verify the contents of the generated CSV file to ensure accuracy.
Create a Pull Request (PR) for the New Incentives CSV File
After generating the csv file, make a PR for the change.
We should setup and use git lfs to make the commit as the file size will exceed the storage limit of git.
Request Sufficient LVN from Michael Belote
Once the PR is approved and merged, need to ask Michael Belote to send the sufficient LVN to the hot wallet.
Execute the Gov-Distribution Script
With the LVN and proper amount of Osmo for fee in the hot wallet, execute the distribution using the following command:
COSMOS_WALLET="mnemonics of hot wallet" cargo run --bin perps-deploy util gov-distribute --network osmosis-mainnet data/rewards/YYYY-MM-DD-trading-incentives.csv
Once the transactions started to made, you can check it from mintscan.